
ARC Raiders is a PvE-focused extraction shooter where environmental conditions shape every raid you undertake. The maps you deploy into are not static environments. Dynamic weather, time-of-day shifts, and special events alter visibility, enemy behaviour, navigation routes, and extraction difficulty in ways that directly impact your survival.
Map conditions are not cosmetic background effects. They are core gameplay systems that determine how aggressive enemies become, how far you can see, where you can safely travel, and how much loot you stand to gain or lose. Players who treat conditions as minor inconveniences tend to lose gear repeatedly. Those who adapt their loadouts, movement patterns, and extraction timing to match current conditions extract consistently.
This guide breaks down every map condition in ARC Raiders, explains how each one changes combat and extraction, and provides practical strategies for surviving even the harshest weather events.

What Are Map Conditions In ARC Raiders?
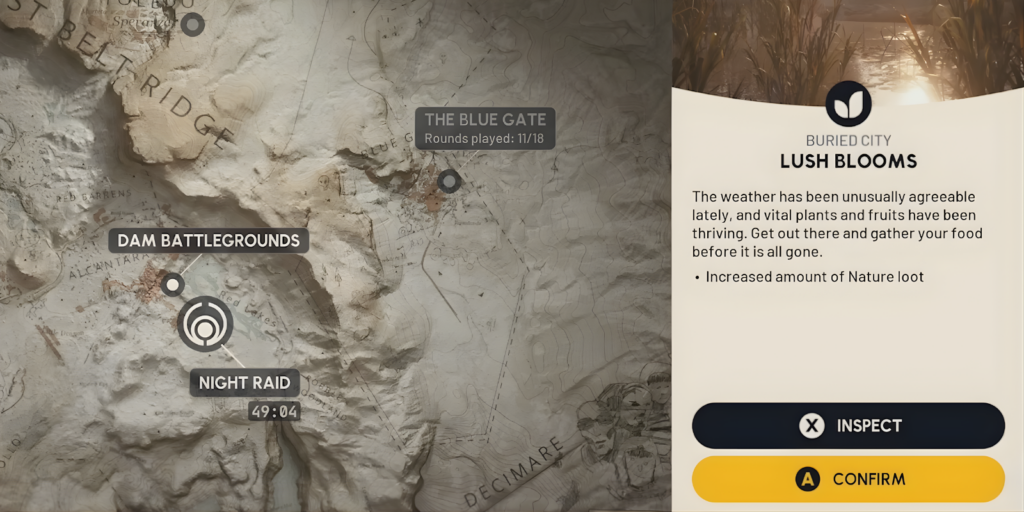
Map conditions are pre-raid environmental modifiers applied to a map instance before you deploy. When you select a map from the menu, you can see the active condition and a countdown timer showing when it will rotate to the next event. Conditions change every hour on a scheduled rotation across all five map regions.
Each condition influences multiple gameplay systems simultaneously:
- Player visibility and audio awareness – Some conditions reduce how far you can see or hear incoming threats
- Enemy spawn behaviour and aggression – Certain events increase ARC patrol frequency and combat intensity
- Safe and unsafe traversal routes – Hazards may block paths or force you into exposed areas
- Return points and extraction options – Major events often reduce available return points and disable Raider Hatches
- Loot quality and quantity – Harder conditions typically offer better rewards
Conditions split into two categories: Minor Events and Major Events. Minor Events change resource availability or add small objectives without drastically altering difficulty. Major Events significantly increase danger while offering double Trials points and improved loot drops. Major events are marked with the Trials icon in the map selection menu.
ARC Raiders Map Conditions Overview
This table provides a quick reference for understanding how each major condition type affects your raid. Use it to decide whether your current loadout and skill level match the active event before deploying.
| Map Condition | Visibility Impact | Combat Impact | Extraction Risk | Overall Difficulty |
| Standard Conditions | Full visibility | Normal enemy behaviour | Low | Low |
| Lush Blooms | Full visibility | Standard encounters | Low | Low |
| Cold Snap | Reduced in blizzards | Environmental pressure | Medium | Medium |
| Night Raid | Severely limited | Increased ARC aggression | High | High |
| Electromagnetic Storm | Severely limited | Lightning hazards, disrupted AI | Very High | Very High |
| Hidden Bunker | Normal | Objective-based pressure | High | High |
| Harvester | Normal | Queen encounter, interior hazards | High | High |
All ARC Raiders Map Conditions Explained
Each condition operates differently and requires specific adjustments to your approach. Understanding what changes and why it matters allows you to prepare appropriately rather than reacting after deployment.
Standard Conditions
Standard conditions represent the baseline ARC Raiders experience. When no special event is active, maps operate with normal daylight, predictable weather, and typical enemy patrol patterns. This is the safest learning environment for new players.
Under standard conditions, enemy spawns follow expected patterns and aggression levels remain manageable. Visibility extends to normal engagement ranges, allowing you to spot threats before they become dangerous. All return points and Raider Hatches function normally, giving you multiple extraction options if a raid goes poorly.
Standard conditions are ideal for:
- Learning map layouts and point-of-interest locations
- Practising gunplay fundamentals against predictable enemies
- Completing quests and objectives without environmental interference
- Testing new loadouts before taking them into harder events
Extraction during standard conditions is straightforward. You have time to clear threats, loot thoroughly, and reach extraction without significant pressure. Use these raids to build map knowledge that will serve you when conditions become harsher.
Lush Blooms
Lush Blooms is a minor event focused on resource gathering rather than combat difficulty. During this condition, natural resources spawn at significantly increased rates across the map. Fruit baskets near settlements contain more items like lemons, apricots, mushrooms, olives, and agave. Additional fruits appear near trees throughout the environment.
Combat and visibility remain unchanged from standard conditions. Enemy behaviour follows normal patterns, and extraction operates without additional pressure. This makes Lush Blooms an excellent farming event for players who need crafting materials or consumables.
The condition suits players who want productive raids without elevated risk. Bring containers with extra inventory space and prioritise hitting known resource spawns efficiently. Since difficulty remains low, this is also a good time to complete secondary objectives while gathering.
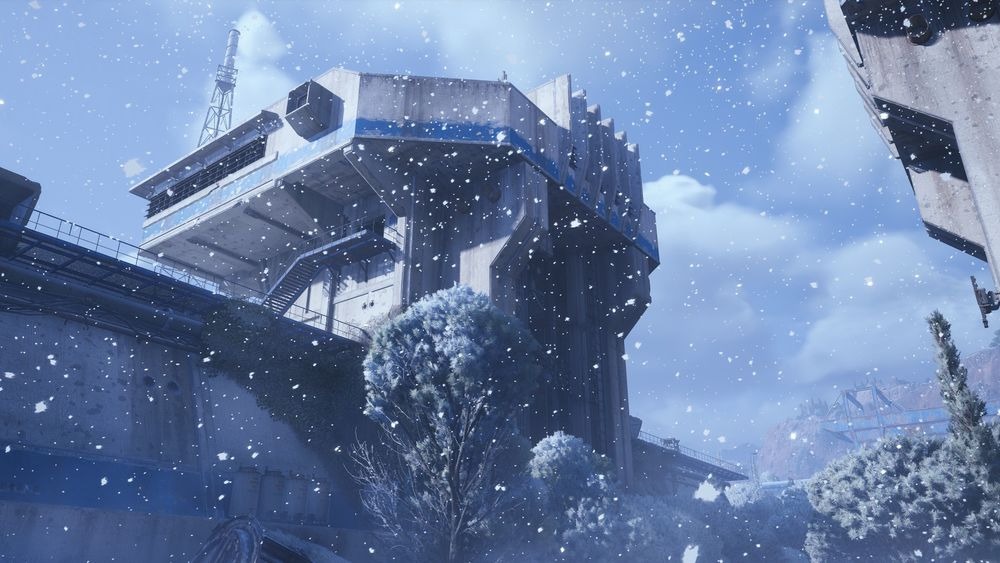
Cold Snap
Cold Snap brings freezing weather and blizzard conditions to most maps except Stella Montis. The moment you deploy, your character begins accumulating cold exposure when outdoors. Extended exposure eventually causes health drain, forcing you to seek shelter periodically.
Despite sounding dangerous, Cold Snap is relatively forgiving. The freezing process takes time before health loss begins, and maps contain numerous shelters where you can warm up and reset the exposure timer. Buildings, covered structures, and certain terrain features all provide protection from the cold.
Blizzards reduce visibility during their peaks, creating temporary windows where long-range engagements become difficult. Movement between shelters requires planning, as getting caught in open terrain during a blizzard while already cold can become dangerous quickly.
Adapt to Cold Snap by:
- Planning routes that pass through sheltered areas
- Timing pushes between blizzard peaks when visibility improves
- Carrying medical supplies to counter any health loss from exposure
- Avoiding extended outdoor engagements during blizzards
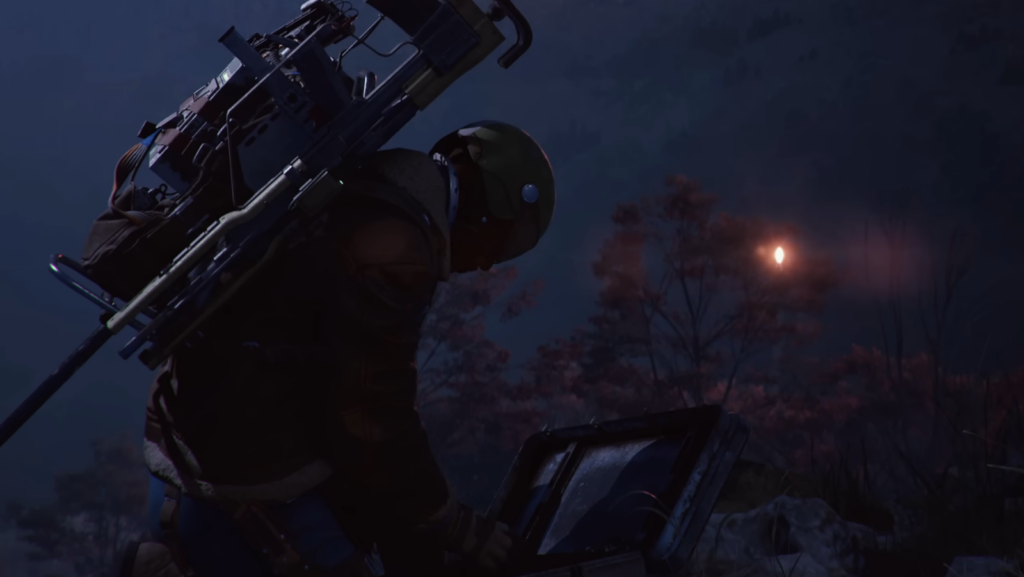
Night Raid
Night Raid is one of the hardest conditions in ARC Raiders. Darkness falls across the entire map, severely limiting visibility and fundamentally changing how engagements play out. ARC enemies become significantly more aggressive, spawning more frequently and pursuing players more persistently.
The reduced visibility cuts engagement distances dramatically. Threats appear suddenly at close range, leaving little time to react. Audio cues become critical for detecting approaching enemies, as visual scanning becomes unreliable beyond short distances.
Night Raids reduce available return points and disable Raider Hatches entirely. This means fewer safe extraction options and longer distances to reach functioning extraction zones. Failed engagements become more punishing because recovery options are limited.
The tradeoff for this difficulty is substantially improved loot quality. Blueprint drop rates increase noticeably, and container contents tend toward higher rarity items. Night Raids also award double Trials points, making them valuable for weekly progression despite the elevated risk.
Surviving Night Raids requires:
- Weapons suited for close-range combat where engagements actually occur
- Heightened audio awareness to detect enemies before visual contact
- Disciplined movement that avoids unnecessary exposure
- Early extraction decisions rather than pushing for maximum loot
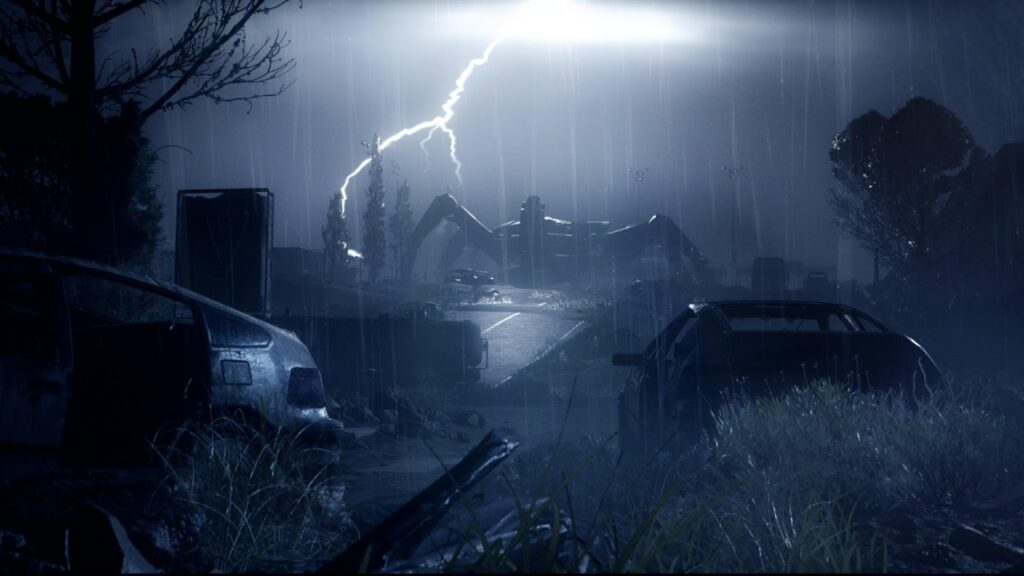
Electromagnetic Storm
Electromagnetic Storm is the most dangerous condition in ARC Raiders. It combines the darkness and reduced return points of Night Raid with active lightning strikes that target the map and deal heavy damage to anything caught in impact zones.
Visibility becomes severely limited. Constant rain and thunder interfere with both sight and hearing, making enemy detection extremely difficult. Players and ARC alike can be struck by lightning, creating chaotic situations where environmental damage compounds combat threats.
Lightning strikes are somewhat telegraphed with flashes and audio cues, but during intense firefights these warnings are easy to miss. Staying stationary in open areas appears to increase strike probability, encouraging constant movement. Interior spaces provide protection from lightning but concentrate enemy encounters.
ARC AI occasionally becomes disrupted during storms, creating moments where patrols behave unpredictably. Some players use this to their advantage by luring enemies into lightning-prone areas and letting the storm eliminate threats.
Despite the extreme difficulty, Electromagnetic Storm offers the best loot quality among all dynamic events. Combined with double Trials points, successful extractions during storms provide exceptional rewards. However, the risk of losing expensive loadouts is equally high.
Storm survival strategies:
- Never stay stationary in open areas for extended periods
- Use buildings for lightning protection while accepting concentrated enemy presence
- Bring loadouts you can afford to lose since deaths are common
- Consider shorter raids focused on high-value targets rather than full map clearing
- Extract early if carrying valuable items rather than pushing for more
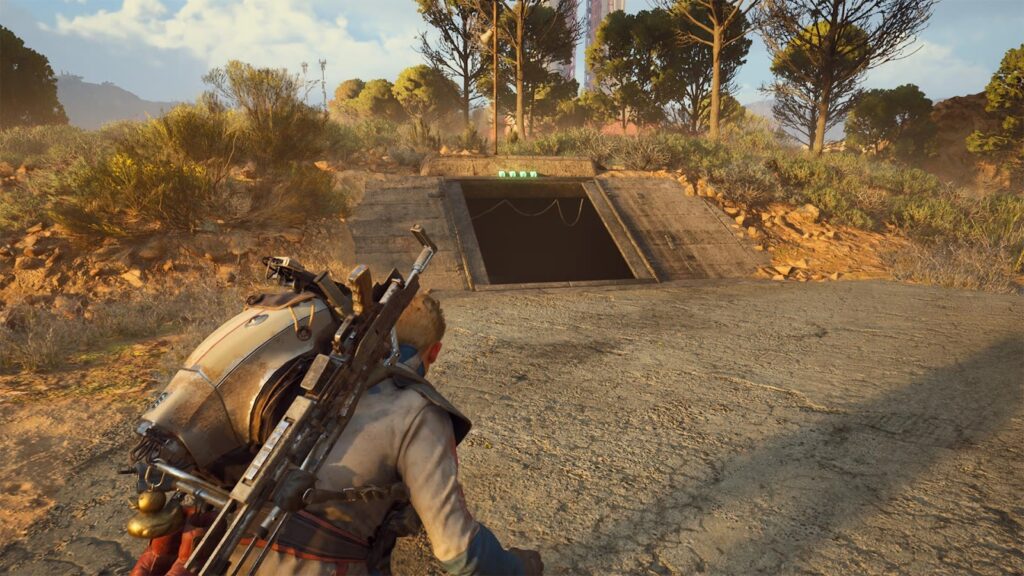
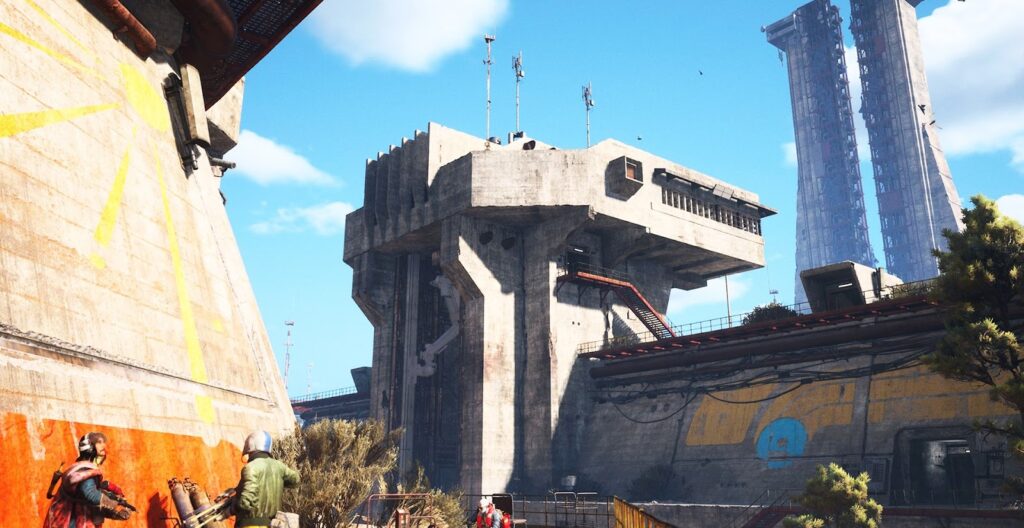
Hidden Bunker (Spaceport)
Hidden Bunker is a Spaceport-exclusive event that adds an objective-based challenge to the map. Four antennas scattered across the map must be activated in sequence to unlock a hidden bunker containing high-value loot.
The event operates on a 40-minute timer. Players must locate and activate all four antennas, defend against ARC waves that spawn at each activation point, and then reach the bunker before time expires. Antenna locations are marked on the in-game map with satellite symbols.
Once all antennas are activated, the bunker opens on the western side of the Spaceport near the Fuel Processing building. Inside, eight data download consoles provide objectives, while weapon cases, containers, and safes offer significantly improved loot rarity.
Competition from other players adds tension. Anyone can take data downloads from consoles you are working on if they reach them first. The bunker becomes a convergence point where multiple squads may contest the same rewards.
Like other major events, Hidden Bunker reduces return points and disables Raider Hatches. Plan your extraction route before entering the bunker, and be prepared for enemy players who may be waiting outside.
Harvester
The Harvester event spawns a massive ARC harvesting machine guarded by the Queen, one of the most dangerous enemies in the game. The harvester interior contains legendary loot including blueprints for high-tier weapons like Jupiter and Equaliser.
Accessing the harvester requires breaching one of three entrance doors while avoiding the Queen patrolling outside. Once inside, the challenge involves a multi-phase puzzle with environmental hazards.
The central column inside the harvester fills the room with fire every 45 seconds. Players must exit and re-breach to continue. Periodic electrical bursts drain shields from anyone caught inside. Three fuel canisters must be collected from around the interior, inserted into the central column, and then yellow nodes destroyed to access the main storage.
Harvester is not recommended for solo players unless significantly overgeared. The damage checks and timing requirements punish mistakes severely. Squads should bring heavy ammunition weapons for interior combat and explosives for clustered ARC spawns at breach points.
Rotate between breach doors rather than repeatedly using the same entrance. This prevents being funneled into predictable positions if other players contest the harvester. When the fire cycle begins, commit fully to being inside or outside. Hesitating near doors during transitions results in deaths.

How Map Conditions Affect Combat & Enemy Behaviour
Map conditions directly influence how enemies detect, pursue, and engage players. Understanding these changes helps you predict encounters rather than being surprised by them.
During standard conditions and minor events, ARC patrols follow predictable routes and react to players within expected detection ranges. Aggression levels remain manageable, and enemies disengage after losing line of sight for sufficient time.
Major events change this behaviour significantly. Night Raids and Electromagnetic Storms increase spawn frequency, meaning more patrols are active simultaneously. Individual enemies also become more aggressive, pursuing players further and longer before breaking off. Detection ranges may shift as visibility changes, but audio detection often increases to compensate.
Reduced visibility conditions favour close-range ambushes. Enemies can close distance before you see them, and your own weapons lose effectiveness at ranges where you cannot acquire targets. This shifts combat away from precision rifles toward weapons that perform well in sudden close encounters.
Environmental hazards during storms create additional combat variables. Lightning can eliminate enemies for you if they cluster in strike zones, but it can equally eliminate you during an engagement. The chaos benefits players who adapt quickly and punishes those who tunnel vision on combat without environmental awareness.

How Map Conditions Impact Extraction Success
Extraction is the most dangerous phase of any raid, and harsh conditions amplify this danger significantly. Everything you collected means nothing if you fail to extract, making condition-aware extraction timing essential.
Major events reduce available return points and disable Raider Hatches. This means fewer extraction options spread across greater distances. If enemies block your primary extraction route, alternatives may require crossing significant portions of the map under pressure.
Delayed extraction during major events carries compounding risks. The longer you remain in-raid, the more likely you are to encounter additional patrols, trigger environmental hazards, or attract other players hunting the same extraction zones. Time pressure increases as the raid extends.
Enemy convergence at extraction points is common during high-value events. Other players and ARC patrols alike tend to gravitate toward functioning return points, creating contested zones where multiple threats overlap.
Early extraction is sometimes the correct strategic choice. If you acquire valuable items early in a major event, extracting immediately preserves those gains rather than risking them for marginal additional loot. A successful extraction with moderate loot beats a failed extraction with nothing.
Best Loadouts For Different ARC Raiders Map Conditions
Loadout selection should respond to active conditions rather than following a universal template. What works during standard conditions may fail completely during storms or night raids.
| Condition | Recommended Weapons | Gear Focus | Squad Strategy |
| Standard / Lush Blooms | Precision rifles, versatile options | Ammo efficiency, carrying capacity | Wider spacing, methodical clearing |
| Cold Snap | Balanced loadouts | Medical supplies, mobility | Coordinated shelter rotations |
| Night Raid | SMGs, shotguns, close-range weapons | Audio awareness gear, quick heals | Tight formation, constant communication |
| Electromagnetic Storm | Versatile mid-range weapons | Mobility, stamina management | Constant movement, flexible positioning |
| Hidden Bunker / Harvester | Heavy weapons, explosives | Sustained combat capability | Role assignment, objective focus |
During visibility-limited conditions, prioritise weapons that perform well at the ranges where engagements actually occur. Carrying a precision rifle into a Night Raid wastes potential because you will rarely have sight lines to use it effectively.
Survivability gear matters more during harsh conditions than damage optimization. Being able to disengage, heal, and reposition keeps you alive long enough to extract. Aggressive loadouts that assume clean engagements underperform when conditions create chaos.

Solo vs Squad Play: How Conditions Change The Meta
Map conditions amplify the advantages of coordinated teamwork while exposing the vulnerabilities of solo players. The gap between solo and squad effectiveness widens significantly during major events.
Squad play benefits enormously from communication during low-visibility conditions. When one player spots a threat, the entire team gains awareness. Callouts compensate for reduced visual information, and coordinated positioning prevents the ambushes that devastate solo players.
Squads can also distribute roles during objective-based events. One player watches for threats while others complete antenna activations or harvester puzzles. This division of attention is impossible for solo players who must handle everything simultaneously.
Solo players face compounding disadvantages during major events. Every threat must be detected personally. Every objective must be completed while remaining vulnerable. Every extraction must be navigated without backup if things go wrong.
Solo survival during harsh conditions requires:
- Heightened caution and slower movement
- Avoiding high-traffic objective areas where squads concentrate
- Earlier extraction decisions with lower loot thresholds
- Loadouts prioritising escape capability over combat power
Solo players should consider whether the rewards of major events justify the elevated risk. Standard conditions and minor events may offer better risk-adjusted returns for players without squad support.

Risk vs Reward: When To Push And When To Extract
Every raid involves decisions about how long to stay and how much risk to accept for additional rewards. Map conditions shift where the optimal balance lies.
During standard conditions, extended raids are relatively safe. You can clear additional areas, complete bonus objectives, and maximise loot without dramatically increasing failure probability. The risk curve rises slowly.
During major events, the risk curve steepens significantly. Each additional minute exposes you to more potential threats while the environment actively works against you. The marginal value of additional loot decreases relative to the increasing probability of losing everything.
High-risk overcommitment is the most common cause of failed extractions during major events. Players acquire valuable items early, then continue pushing for more rather than securing what they have. A single bad engagement erases the entire raid.
Extraction is a success condition, not a failure condition. Leaving early with confirmed loot beats staying late and losing it all. This mindset adjustment separates consistent progression from boom-and-bust cycles where occasional big hauls are offset by repeated total losses.
Develop personal extraction triggers based on conditions. During storms, extract immediately after acquiring any high-value item. During night raids, set a loot threshold and leave once reached regardless of remaining time. During standard conditions, more aggressive thresholds are sustainable.
ARC Raiders Map Conditions Tips For Beginners
If you’re new to the game, view our full ARC Raiders beginners guide. If you have already read that, and you are looking for specific guidance on the ARC Raiders Map, these takeaways summarise the most important lessons for players still learning how conditions affect their raids:
- Check conditions before deploying – The map selection menu shows active events and rotation timers. Never deploy blind.
- Start with standard conditions and minor events – Build map knowledge and combat fundamentals before attempting major events.
- Match your loadout to the condition – Close-range weapons for night raids, versatile options for storms, whatever suits your objectives for standard conditions.
- Prioritise extraction over maximum loot – A successful small extraction beats a failed large one every time.
- Learn audio cues – When vision fails, hearing becomes your primary threat detection. Practice identifying enemy sounds.
- Use squads for major events – The difficulty increase during night raids and storms is balanced around team play. Solo attempts are significantly harder.
- Bring expendable loadouts to high-risk events – Until you are confident, use gear you can afford to lose. Learning through failure is normal.
- Track the event rotation – Community tools like MetaForge and ARCRaidersHub show upcoming conditions. Plan your sessions around events that match your goals.
Why Understanding Map Conditions Is Essential In ARC Raiders
Map conditions are not obstacles to overcome but strategic variables to incorporate into your planning. Players who treat conditions as annoying interference will struggle. Players who adapt their approach based on active conditions will succeed consistently.
The difference between successful raiders and those who repeatedly lose gear often comes down to condition awareness. Knowing that a Night Raid demands different weapons, different movement, and different extraction timing than standard conditions allows you to prepare appropriately rather than reacting after problems occur.
Learn to read conditions as strategic signals. A Lush Blooms event signals a farming opportunity with minimal risk. An Electromagnetic Storm signals exceptional rewards available to players willing to accept exceptional danger. Neither is inherently good or bad. Both offer value to players who understand what they are entering.
Adaptation separates long-term progression from frustrating repetition. Every condition teaches something about the game if you pay attention. Failed raids during storms reveal what preparations you lacked. Successful extractions during night raids confirm that your approach works. Treat conditions as learning opportunities and your performance will improve steadily over time.
Still struggling to master each raid? Our ARC Raider cheats can give you the boost you need!
ARC Raiders Map Conditions FAQs
Do map conditions change mid-raid?
No. The condition active when you deploy remains constant for your entire raid. Conditions rotate hourly, but only new deployments are affected. If you deploy during a Night Raid and the timer shows five minutes remaining, your raid stays a Night Raid even after the rotation occurs for the overworld map selection.
Can players see map conditions before deploying?
Yes. The map selection menu displays the active condition for each region along with a countdown timer showing when the next rotation occurs. Always check conditions before deploying so you can adjust your loadout and expectations appropriately.
Which condition is hardest for new players?
Electromagnetic Storm is the most difficult condition overall due to combined visibility reduction, lightning hazards, and increased enemy pressure. Night Raid is a close second. New players should gain experience during standard conditions and minor events before attempting either major event type.
Do conditions affect loot quality?
Yes. Major events like Night Raid and Electromagnetic Storm offer significantly improved loot quality, including higher blueprint drop rates and better container contents. Minor events like Lush Blooms increase specific resource spawns without affecting overall loot rarity. Standard conditions provide baseline loot tables.
Are certain conditions more common?
Conditions rotate on a fixed hourly schedule across all five map regions. No condition is inherently more common than others, but the rotation means specific conditions appear at predictable times. Community tracking tools show upcoming rotations so you can plan sessions around desired events.