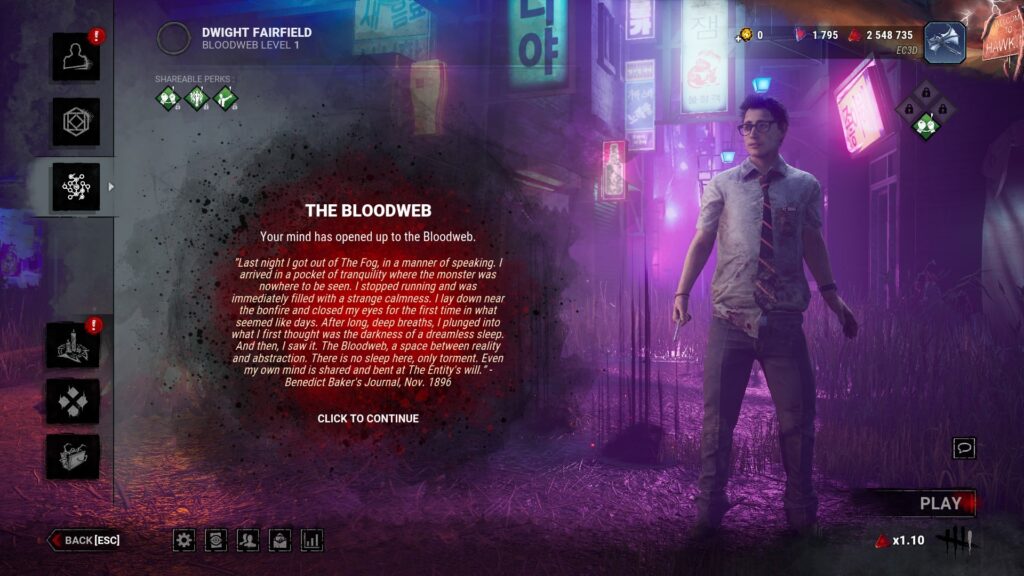
Perks are the single most important mechanical layer in Dead by Daylight, outranking character choice, offering choice, item selection, and even map offerings in terms of raw match impact. A 4v1 asymmetric horror game built around generator repair, chase mechanics, and hook states lives or dies on whether the four perk slots equipped by each player actually counter the pressure the opposing side is putting out. Every Survivor brings three unique teachable perks, every Killer brings three, and Behaviour Interactive has shipped well over 250 total perks across the game’s lifespan, which means the active meta shifts constantly as balance patches tune cooldowns, token counts, aura reading ranges, and regression percentages.
Perk slots are shareable across the entire roster through the Bloodweb once a character reaches level 40 and unlocks their teachable tier, so a new Survivor unlock is never locked behind playing one specific character forever. This teachable system means the correct way to think about Dead by Daylight perks is as a toolbox rather than as character-exclusive abilities, and experienced players rotate loadouts to counter specific Killer archetypes, map layouts, and queue types. A stealth Wraith build requires a different Survivor perk kit than a Nurse build, a competitive SWF prestige run demands different perks than solo queue, and a Hex-heavy Killer build punishes completely different Survivor behaviours than a pure regression build.
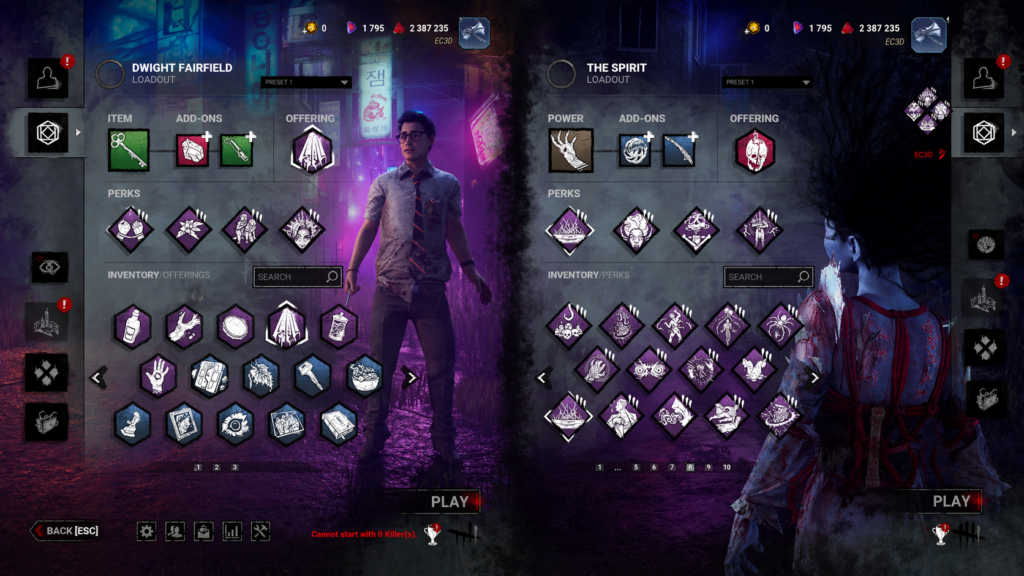
Perk selection affects how matches actually play out, not just how your loadout appears on the pre-match screen. A Survivor running Windows of Opportunity, Sprint Burst, Dead Hard, and Adrenaline will handle a 12-hook chase roulette match very differently than one running Bond, Kindred, Prove Thyself, and We’ll Make It. A Killer running Pop Goes the Weasel, Pain Resonance, Jolt, and Corrupt Intervention forces Survivors into a completely different tempo than one running Lethal Pursuer, BBQ & Chili, Nowhere to Hide, and I’m All Ears. This guide breaks down every major Survivor and Killer perk in the current meta, categorises them by function, ranks them for beginner through advanced play, and explains the synergies that decide modern matches.
Understanding the perk system properly is what separates players who plateau at Ash ranks from those who consistently grade up to Iridescent. The information-density difference between a no-perk run and a fully equipped optimised loadout is measured in seconds saved per generator, auras revealed per hook, and pallets respected per chase. Read this guide, then pair it with character selection fundamentals and deliberate map knowledge, and your win rate will climb regardless of which side you main.
What Are Perks in Dead by Daylight?
Perks are passive or active abilities equipped into four loadout slots, activated under specific trigger conditions defined per perk, and they apply only to the character who has them equipped. Each of the 40+ Survivors and 35+ Killers in the roster arrives with three unique perks, which are locked to that character until the character reaches Prestige 1 (level 50 on the Bloodweb before the 6.1.0 rework, or Prestige 1/2/3 under the current system). Once prestiged, those perks enter every other character’s Bloodweb at tier 1, tier 2, and tier 3 respectively, letting the whole roster equip them.
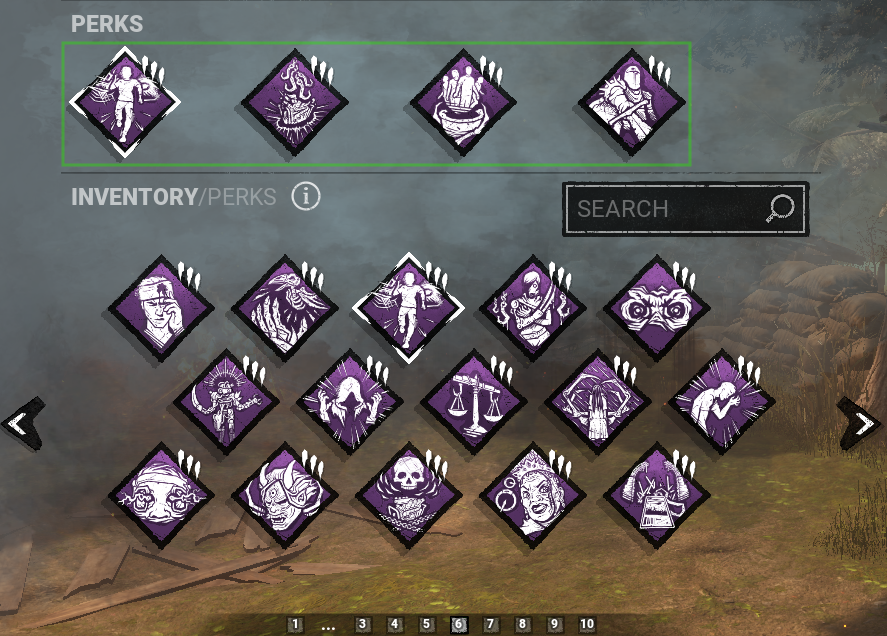
Loadout slots are hard-capped at four, which forces real decisions. You cannot run every strong perk simultaneously, so every build is a tradeoff between survivability, utility, information, and objective pressure on the Survivor side, or between slowdown, tracking, chase dominance, and snowball on the Killer side. The perk tier system scales the numbers on each perk (tier 1, tier 2, tier 3 improve durations, distances, percentages) and most players run full tier 3 builds once they have the bloodpoints to invest.
Survivor perks are judged on five axes: raw utility to the whole team, chase survival for the equipped player, teamwork value that multiplies across four Survivors, information density that reduces guesswork, and anti-tunnel capability that protects against a Killer focusing one Survivor through multiple hook states. The best Survivor perks score on multiple axes at once, which is why perks like Windows of Opportunity and Kindred appear in so many builds. They deliver information and chase survival or team coordination with zero downside cost.
Killer perks are judged on five axes as well: generator slowdown that extends match length, tracking that reduces the time spent searching empty map, hook pressure that converts first-hit into first-hook reliably, snowball that chains a single down into a match-winning cascade, and chase dominance that shortens individual loops against mechanically skilled Survivors. The meta Killer perk list is dominated by regression options because generator speed is the single hardest pressure vector to stabilize without dedicated perk slots.
Dead by Daylight Perks Overview
| Role | Loadout Slots | Core Perk Function | What Makes Perks Different | Best For |
|---|---|---|---|---|
| Survivor | 4 | Survive chases, complete 5 generators, escape through a gate or hatch | Team-scaling auras, self-heal speed, exhaustion mobility, anti-tunnel protection | Players who want to learn looping, altruism, and information reading |
| Killer | 4 | Down and hook 4 Survivors 12 times, deny the 5-gen objective | Regression events, aura reads, anti-loop chase tools, end-game lockdowns | Players who want to learn map pressure, tile control, and snowball timing |
| Shared Mechanics | Tier 1/2/3 scaling | Numbers scale with bloodweb investment, teachable once prestiged | All perks are equippable on any character in the role once unlocked | Building flexible loadouts across the full roster without re-grinding |
| Meta Limitation | 4 total | Forces synergy choices between slowdown, info, utility, chase | No loadout covers every axis, every build has a weakness | Learning to read the opposing side and counter-pick between matches |
How To Read the Dead by Daylight Perk System
different trigger logic. Killer perks typically fire on hook events, hit events, generator interactions, or aura-read intervals, while Survivor perks fire on heal completion, skill check success, hook rescue, unhook, exhaustion reset, or generator-repair tick. Mixing up the trigger family leads to dead builds where three perks never meaningfully activate in the same match.
Category comes next. Perks fall into natural families (stealth, healing, chase, objective, anti-tunnel on Survivor side; regression, tracking, chase, snowball, denial on Killer side) and good loadouts always run two to three different categories rather than quadruple-stacking one. A Survivor with four healing perks and no chase perk gets tunneled off hook and never plays the match. A Killer with four aura-read perks and no slowdown watches five generators pop in five minutes.
Context matters third. MacMillan Estate maps like Coal Tower favour long-range tracking perks because sightlines are open, while Lery’s Memorial Institute punishes them because the map is indoor and segmented. Nurse wants different Killer perks than Trapper. A four-stack SWF on voice comms wants different Survivor perks than a solo player with no info. The same perk can be S-tier on one character on one map against one player pool and C-tier in the next match.
Playstyle and experience close the framework. Stealth-oriented Survivors extract different values from Iron Will and Calm Spirit than chase-oriented Survivors do. Aggressive Killers snowball harder with Make Your Choice than patient ones do. Beginners should run perks that teach a single mechanic well (Windows of Opportunity teaches pallet awareness, Whispers teaches map scanning) rather than complex conditional perks that require specific match states to fire.
Dead By Daylight All Survivor Perks Explained
The Survivor perk pool currently sits above 130 unique perks across base roster, licensed chapters, and general perks earned through the Shrine of Secrets or paragon unlocks. The table below covers the 40 most impactful perks in the active meta, cross-referencing their character origin, functional category, and skill floor so you can build a loadout that matches your actual play level.
| Perk | Character Origin | Category | Core Function | Best For | Difficulty |
|---|---|---|---|---|---|
| Windows of Opportunity | Kate Denson | Information | Reveals pallet and breakable wall auras within 32 meters | Any player learning map layouts and loop structure | Beginner |
| Sprint Burst | Meg Thomas | Exhaustion | 150% sprint for 3 seconds on sprint activation while healthy | Map traversal and instant chase pressure relief | Intermediate |
| Dead Hard | David King | Exhaustion | Grants endurance for 0.5s after unhook within 60s, 40s exhaustion | Extending chases by baiting a Killer hit through a pallet or window | Advanced |
| Adrenaline | Meg Thomas | Endgame | Instantly heals one state and 150% sprint for 5s when gens pop | Five-gen endgame clutch plays and hook rescues | Beginner |
| Decisive Strike | Laurie Strode | Anti-Tunnel | 5s stun after unhook within 60s if Killer picks you up | Solo queue tunnel protection | Intermediate |
| Kindred | General | Information | Reveals all Survivor auras and Killer aura within 16m of hook | Solo queue coordination, altruism timing | Beginner |
| Prove Thyself | Dwight Fairfield | Objective | +15% repair speed per other Survivor within 4m | Coordinated team repair bursts | Beginner |
| Off The Record | Zarina Kassir | Anti-Tunnel | 80s endurance after unhook, no scratch marks, no grunts | Modern anti-tunnel replacement for DS | Beginner |
| Lithe | Feng Min | Exhaustion | 150% sprint for 3s after fast vault, 40s exhaustion | Window-heavy loops and high-vault maps | Intermediate |
| Borrowed Time | Bill Overbeck (Base kit) | Altruism | Base kit unhook endurance, 10s protection after save | Anti-camping rescues | Beginner |
| Unbreakable | Bill Overbeck | Recovery | 35% faster recovery, self-pickup from dying once per match | Slug counter and anti-tunnel insurance | Beginner |
| Resilience | General | Hybrid | +9% action speed while injured | Gen rushing, vaulting, healing while hurt | Beginner |
| We’ll Make It | David King | Healing | +100% heal speed on others for 90s after unhook | Fast rescue-and-heal chains | Beginner |
| Iron Will | Jake Park | Stealth | Reduces grunts of pain by 100% (currently 75%) | Losing chases via audio denial | Intermediate |
| Bond | Dwight Fairfield | Information | Reveals Survivor auras within 36m | Avoiding Killer pull and coordinating altruism | Beginner |
| Botany Knowledge | Claudette Morel | Healing | +33% heal speed, +33% med-kit efficiency | Fast solo and mutual heals | Beginner |
| Deja Vu | General | Objective | Reveals three gens in closest three-gen formation, +6% repair on those | Denying three-gen scenarios and gen prioritisation | Beginner |
| Self-Care | Claudette Morel | Healing | Self-heal without a med-kit at 35% speed | Solo sustain when med-kits aren’t available | Beginner |
| Balanced Landing | Nea Karlsson | Exhaustion | 75% stagger reduction, 150% sprint for 3s after falling | Haddonfield, Mother’s Dwelling, and tall-drop maps | Intermediate |
| Head On | Kate Denson | Chase | Stun Killer for 3s by leaving a locker with 3s charge | Locker bait plays and chase resets | Advanced |
| Dance With Me | Kate Denson | Stealth | No scratch marks for 3s after fast vault or locker leave | Loss-of-line-of-sight chase mindgames | Advanced |
| Quick and Quiet | Meg Thomas | Stealth | Suppresses fast vault and locker sound for 30s cooldown | Locker stealth and chase breaks | Intermediate |
| Clairvoyance | Mikaela Reid | Information | 10s aura reveal of exits, gens, chests, hatch within 64m on empty hand | Hatch plays and endgame navigation | Intermediate |
| Stake Out | Detective Tapp | Objective | Build tokens near Killer, consume for great skill check auto-conversion | Hyperfocus stacking and fast gen repair | Intermediate |
| Empathy | Claudette Morel | Information | Injured Survivor auras within 128m | Heal prioritisation and chase read | Beginner |
| Spine Chill | General | Information | Lights up when Killer faces you within 36m | Stealth Killer counter (Wraith, Ghost Face) | Beginner |
| Calm Spirit | Jake Park | Stealth | No crow activation, 100% slower scream interaction | Doctor, Onryo, and crow-based map control counter | Intermediate |
| Plunderer’s Instinct | General | Utility | Reveals chest auras, +30% better item rarity | Item-heavy builds and chest play | Beginner |
| Ace in the Hole | Ace Visconti | Utility | +100% chance of add-ons, leave trials with items | Loot optimisation and add-on farming | Beginner |
| Hope | General | Endgame | +7% permanent movement speed when gates are powered | Endgame chase survival | Beginner |
| Tenacity | Detective Tapp | Recovery | Crawl 50% faster, recover while crawling, silent dying state | Slug recovery and hatch plays | Intermediate |
| Saboteur | Jake Park | Altruism | Sabotage hooks without toolbox, reveal hooks within 56m while carried | Anti-hook trades and basement denial | Advanced |
| Open-Handed | Ace Visconti | Information | +8m aura read range for all Survivors | Stacking with Bond, Kindred, Empathy | Beginner |
| Leader | Dwight Fairfield | Utility | +25% action speed to Survivors within 8m (non-repair) | Heal and unhook speed stacking | Beginner |
| No One Left Behind | Bill Overbeck | Endgame | +100% unhook speed, +50% altruism BP when gates are powered | Endgame altruism builds | Beginner |
| Left Behind | Bill Overbeck | Information | Reveals hatch aura within 32m when last alive | Hatch escape reliability | Beginner |
| Sole Survivor | Laurie Strode | Utility | Aura hide and +50% action speed when teammates die | Solo hatch and endgame plays | Intermediate |
| Built to Last | Felix Richter | Utility | Refill item charges 99% after 14s in locker | Extended med-kit or toolbox builds | Intermediate |
| Desperate Measures | Felix Richter | Healing | +10% per injured/hooked Survivor to heal and unhook speed | Late-match altruism under heavy pressure | Beginner |
| Fogwise | Jonah Vasquez | Information | Reveal Killer aura for 5s on great skill check | Gen-tick information and chase prediction | Advanced |
| Overcome | Yui Kimura | Exhaustion | Extends sprint duration by 2s after taking a hit | Distance creation after hit trades | Intermediate |
| Hyperfocus | General | Objective | Stacks great skill check bonuses up to +46% repair speed | Stake Out + Deja Vu skill check builds | Advanced |
| Fast Track | Yun-Jin Lee | Objective | +3% gen progress per hooked Survivor on next gen | Post-hook gen acceleration | Beginner |
| Situational Awareness | Claudette Morel | Information | Reveals Survivor auras while repairing, +6% co-op repair | Co-op gen prioritisation | Beginner |
| Small Game | General | Information | Scream and token drain near totems/traps within 28m cone | Hex hunting and Trapper counter | Intermediate |
Stealth and Information Perks (Survivor)
Stealth and information perks are the backbone of solo queue survival because they replace the voice communication that a SWF uses for free. Kindred is the single highest-value information perk in the game because it simultaneously solves three problems: it tells the other three Survivors whether they need to go for the rescue, it reveals whether the Killer is camping by showing their aura within 16m of the hook, and it exposes Survivor positions so two teammates don’t collide on the same unhook attempt. Every solo queue loadout should consider Kindred before anything else, and Open-Handed extends its range to 24m which effectively covers half the map on smaller layouts.
Bond reveals Survivor auras within 36m and directly teaches new players how to avoid being dragged into another Survivor’s chase. Running away from the Killer blind and happening to sprint into the teammate who is actively being chased is the most common solo queue death, and Bond eliminates that scenario entirely. Empathy does the inverse by revealing injured Survivor auras at 128m, which is effectively the whole map, so you can both prioritise healing and read which gens are dangerous because a chase is happening near them.
Spine Chill lights up whenever the Killer stares at you within 36m, which is the single best stealth-Killer counter in the game. Wraith, Ghost Face, Pig with crouch, Myers at Tier 1, Dredge at night, and Freddy mid-transition all rely on approach angles that Spine Chill breaks open. Windows of Opportunity reveals pallet and breakable wall auras within 32m, which teaches loop structure better than any amount of YouTube study because you see the resource availability in real time during an actual chase.
Calm Spirit silences crows and reduces scream interaction speed by 100%, which directly counters Doctor’s Madness tier screams, Onryo’s condemnation tapes when thrown, and The Unknown’s hallucination spread. It also silences the crows that normally call out your location when you walk through them, making it a quiet stealth pick on maps like Red Forest. Iron Will was nerfed from 100% to 75% grunt reduction and then partially reverted depending on patch, but even at reduced value it wins chases by breaking a Killer’s audio lock when you lose line of sight. Dance With Me pairs with Iron Will or Quick and Quiet to remove scratch marks for 3 seconds after a fast vault or locker exit, creating the clean stealth break that breaks a Nurse’s blink commitment or a Wraith’s windstorm ambush.
Healing and Support Perks

Healing perks determine how quickly your team converts injured states back to health, which directly determines how many hits the Killer needs to land to get a down. We’ll Make It is the undisputed best altruism healing perk in the game because it grants +100% heal speed on others for 90 seconds after you personally unhook someone. That doubles the base 16 second heal to 8 seconds, which turns a post-unhook heal from a liability into a near-instant interaction that the Killer cannot realistically interrupt unless they are actively camping.
Botany Knowledge provides a flat +33% to healing actions and +33% to med-kit efficiency, stacking multiplicatively with We’ll Make It for absurd heal speeds. Self-Care was the dominant solo heal perk for years at 50% speed, got nerfed to 35%, and remains useful only as an insurance perk rather than a primary tool. The modern self-heal meta runs Inner Healing (dull totem cleanse into locker heal) or item-based self-heals with Botany stacking.
Autodidect turns the skill check system into a healing engine by starting heals at a -25% penalty but granting +15% per great skill check up to a five-token cap, ending at +50% heal speed with max tokens. It requires actual skill check consistency to pay off, which makes it a mid-to-high skill floor perk. Desperate Measures scales with injured and hooked Survivor count at +10% per, capping at +40% when the team is in bad shape, which makes it the late-match altruism multiplier of choice.
Leader grants +25% action speed on non-repair interactions to Survivors within 8m, stacking with We’ll Make It and Botany for triple-stacked heal speed in rescue pods. Prove Thyself deserves mention here too because although its primary function is generator repair, the +15% per nearby Survivor also applies to great skill check value. The key insight across the healing perk family is that team heal speed compounds exponentially, and one well-built medic Survivor running Leader + We’ll Make It + Botany + Prove Thyself can solo-stabilise a tunnelled teammate while the other two Survivors finish gens.
Chase and Endurance Perks
Chase perks decide whether a single Killer attack eliminates you from the match or extends your loop by 15 seconds. Exhaustion perks are the primary tool because they grant a 150% speed burst that moves you faster than Killer movement speed (4.6 m/s vs your 4 m/s sprint = 6 m/s burst), which breaks line of sight and resets distance. Sprint Burst is the most versatile exhaustion perk because it triggers on demand and works on any terrain, but it requires the player to manage walking cadence so the perk is up when they need it.
Dead Hard got extensively reworked and now only grants endurance for 0.5 seconds during a dead hard dash, with a 40-second exhaustion cooldown, and requires you to be unhooked within the last 60 seconds to activate. This turned Dead Hard from the default chase extender into a specific anti-tunnel tool, and it still wins chases by baiting a Killer swing through a pallet or window where the endurance window overlaps with the vault animation.
Lithe triggers on fast vaults and is the go-to perk on window-heavy maps like Disturbed Ward, Father Campbell’s Chapel, and Groaning Storehouse. Balanced Landing triggers after falling from height with 75% stagger reduction, making it the unambiguous pick on Haddonfield, Mother’s Dwelling, and Nostromo Wreckage where tall drops are baked into the layout. Overcome extends an existing sprint by 2 seconds after taking a hit, which is the hit-trade value perk that turns a bad loop into a survivable one.
Resilience provides +9% action speed while injured across vaults, gen repair, and heal interactions. It is the perk that makes injured builds work because pairing it with a health-state perk like Off The Record means you are functionally always at +9% to everything. Hope grants +7% permanent movement speed when gates are powered, turning the endgame into a legitimate chase zone where even a 115% Killer cannot close the gap once you have distance. The combination of an exhaustion perk plus Resilience plus Hope plus an anti-tunnel perk is the current SWF chase-Survivor meta.
Generator and Objective Perks
Generator perks attack the Killer’s one true enemy, which is match time. Prove Thyself grants +15% repair speed per other Survivor within 4m, stacking additively up to +45% when all four are on one gen. A base gen takes 90 seconds at 1 charge per second with four Survivors repairing. With four-Survivor Prove Thyself stacked, a gen finishes in roughly 16 seconds of real time. That is faster than most Killers can cross the map, which is why Prove is permanently in the S-tier.
Deja Vu reveals the three gens in the closest three-gen formation and grants +6% repair speed on those specific gens. It is simultaneously a gen-priority perk, a three-gen denial perk, and a repair speed perk, which gives it triple-axis value. Killing the three-gen before the Killer sets it up is the number one tactical priority in competitive DBD, and Deja Vu makes that priority visible to players who haven’t memorised every map layout.
Hyperfocus stacks great skill check bonuses to +46% repair speed per skill check, chaining up to the cap when paired with Stake Out’s token system that auto-converts good skill checks to great ones. The full Stake Out + Hyperfocus + Deja Vu + Resilience build reaches sub-50 second gens at peak efficiency, assuming you land consecutive skill checks, which is why this is the competitive SWF gen rush standard.
Fast Track grants +3% gen progress per hooked Survivor on your next gen repair, turning the Killer’s hook events into your progress gain. Fogwise reveals the Killer’s aura for 5 seconds on every great skill check, which means committed gen work turns into continuous tracking information. Situational Awareness shows Survivor auras while you repair and grants +6% co-op repair speed, which functions as a light Prove Thyself. These perks collectively answer the question, how do we get five gens done before the Killer gets 12 hooks, and they are the reason regression Killer perks dominate the opposing meta.
Anti-Tunnel and Recovery Perks
without counterplay this strategy wins 80% of matches against unorganised teams. Decisive Strike stuns the Killer for 5 seconds if they pick you up within 60 seconds of unhook, and although it was nerfed from 4 seconds to 3 seconds of stun at one point, the current 5-second version properly punishes tunneling.
Off The Record grants 80 seconds of endurance after unhook, hides your aura from all aura reads, and removes grunts of pain. Endurance means the next hit puts you in the deep wound state instead of downing you, creating a buffer that turns tunnel attempts into wasted Killer minutes. OTR is the post-6.1.0 replacement for the old DS meta because it is more consistent, it pairs with Dead Hard’s 60s activation window, and it covers chase-based tunnel rather than pickup-based tunnel.
Unbreakable lets you recover from the dying state once per match at +35% recovery speed, and it is the universal slug counter. A Killer who downs and leaves for 30 seconds to find the other Survivors expects to return and hook you, but Unbreakable turns that scenario into a free escape. Tenacity grants +50% crawl speed and lets you recover while crawling, which extends slug-denial plays to the point where a Killer can lose a downed Survivor entirely.
Borrowed Time is now base kit after the 6.1.0 update, granting 10 seconds of endurance to the unhooked Survivor, which means the dedicated perk slot used to run Borrowed was freed up for OTR or DS. Soul Guard grants endurance after self-pickup from Unbreakable or a teammate pickup when a Hex totem is active, turning the Hex snowball into a counter-snowball opportunity. These perks do not win matches on their own, but they prevent matches from being lost in the first 3 minutes to a tunnel strategy.
Dead by Daylight All Killer Perks Explained
The Killer perk pool sits above 120 unique perks and the meta is heavily skewed toward regression because generator speed is the fundamental pressure vector every Killer must answer. The 40 perks below cover the core of current competitive Killer play, from regression workhorses to chase-dominant options to endgame lockdown tools.
| Perk | Character Origin | Category | Pressure Style | Best Strength | Difficulty | Best For |
|---|---|---|---|---|---|---|
| Hex: Ruin | The Hag | Regression | Passive gen decay | Unattended gens regress at 100% | Beginner | Mobile Killers (Nurse, Blight, Spirit) |
| Pop Goes the Weasel | The Clown | Regression | Kick-based burst | -30% of current gen progress on kick | Beginner | All-around slowdown |
| Corrupt Intervention | The Plague | Regression | Early match lockout | 3 farthest gens blocked 120s at match start | Beginner | Setup Killers (Trapper, Hag, Artist) |
| Scourge Hook: Pain Resonance | The Artist | Regression | Hook-based explosion | Highest-progress gen regresses 10% on hook | Beginner | Every modern meta build |
| Deadlock | The Cenobite | Regression | Gen-completion lock | Blocks highest-progress gen for 30s | Beginner | Three-gen Killers |
| Jolt (Surge) | Original | Regression | Down-based burst | -8% gen progress on all gens within 32m of down | Beginner | M1 Killers near gen clusters |
| Call of Brine | The Singularity | Regression | Kick-based zone | Kicked gen regresses 200% for 60s, aura pulse | Beginner | Three-gen defense |
| Overcharge | The Doctor | Regression | Skill-check punish | Kicked gen triggers difficult skill check | Beginner | Low-repair-skill Survivor pools |
| Eruption | The Nemesis | Regression | Chain regression | Kicked gens explode when you down someone | Intermediate | Fast-down Killers post-nerf |
| Grim Embrace | The Artist | Regression | Hook-based block | Blocks all gens for 40s at 4 unique hooks | Beginner | Spread-hook Killers |
| Hex: Devour Hope | The Hag | Snowball | Stacking kill power | 5 tokens grants permanent exposed and mori | Advanced | Hex-stacking builds |
| BBQ & Chili | The Cannibal | Tracking | Post-hook aura read | Reveals Survivors 40m+ from hook for 4s | Beginner | All Killers for routing |
| Lethal Pursuer | The Nemesis | Tracking | Match-start aura | Reveals all Survivors for 9s at match start | Beginner | Finding first chase fast |
| Whispers | Original | Tracking | Proximity indicator | Activates within 32m of a Survivor | Beginner | Hatch searches and empty-map scans |
| Nowhere to Hide | The Knight | Tracking | Kick aura read | 12s aura read within 24m of kicked gen | Beginner | Gen defense and three-gen lock |
| I’m All Ears | Ghost Face | Tracking | Vault aura read | 6s aura read after fast vault | Intermediate | Chase prediction and loop closure |
| Floods of Rage | The Onryo | Tracking | Unhook aura read | 5s aura read on all Survivors at unhook | Beginner | Post-hook repositioning |
| Bitter Murmur | General | Tracking | Gen-completion aura | Aura read at gen pop and endgame | Beginner | Endgame lockdown |
| Make Your Choice | The Pig | Snowball | Far-rescue punish | Expose for 60s on 32m+ unhook | Beginner | Anti-altruism builds |
| Bamboozle | The Clown | Chase | Vault denial | +15% vault speed, blocks window 8s | Beginner | Main-building loop denial |
| Brutal Strength | General | Chase | Pallet/gen break | +20% pallet and gen break speed | Beginner | Low-mobility Killers |
| Spirit Fury | The Spirit | Chase | Pallet break | Auto-break pallet after 4 stuns | Intermediate | Pallet-heavy loops |
| Enduring | General | Chase | Stun reduction | -50% pallet stun duration | Beginner | Pairing with Spirit Fury |
| Fearmonger | The Nemesis | Chase | Repair punish | Applies exhaustion and blindness while repairing | Beginner | Gen-camping Survivors |
| Coup de Grace | The Twins | Chase | Lunge extension | +80% lunge distance on charge | Intermediate | Tile-defining lunge plays |
| Save the Best for Last | The Shape | Chase | Attack cooldown | Up to -40% attack cooldown via obsession management | Advanced | M1 Killers avoiding obsession |
| Hex: No One Escapes Death | General | Endgame | Exposed effect | All Survivors exposed at endgame if totem stands | Beginner | Endgame chase closure |
| Rancor | The Spirit | Endgame | Obsession mori | Obsession exposed and mori-able at endgame | Intermediate | Obsession-focused builds |
| Blood Warden | The Nightmare | Endgame | Gate seal | Blocks exit gates 40s after hook in endgame | Intermediate | Gate chase lockdowns |
| Surveillance | The Pig | Information | Regression aura | Highlights regressing gens, 8s active aura | Beginner | Three-gen defense |
| Tinkerer | The Hillbilly | Information | Gen-progress alert | Undetectable and aura alert at 70% gen | Beginner | Stealth approaches on high-progress gens |
| Discordance | The Legion | Information | Co-op gen alert | Yellow aura on 2+ Survivor gens within 96m | Beginner | Countering Prove Thyself stacks |
| Bloodhound | The Wraith | Tracking | Blood pool visibility | Brighter blood, longer duration | Beginner | Iron Will counter |
| Stridor | The Nurse | Tracking | Audio amplification | +50% injured grunt volume | Beginner | Iron Will counter on audio Killers |
| Forced Hesitation | The Houndmaster | Chase | Slowdown AOE | All Survivors within 12m suffer hindered | Beginner | Group-chase disruption |
| Hex: Face the Darkness | The Dredge | Information | Periodic scream | Survivors periodically scream while injured | Intermediate | Tracking injured stealth Survivors |
| A Nurse’s Calling | The Nurse | Tracking | Heal aura read | Survivor auras visible while healing within 28m | Beginner | Interrupting heal trades |
| Dragon’s Grip | The Blight | Denial | Kick punish | Exposed 60s to first Survivor interacting with kicked gen | Intermediate | Combo with Surveillance |
| Hex: Plaything | The Cenobite | Denial | Oblivious affliction | Oblivious for unhooked Survivor until totem found | Beginner | Stealth Killer combos |
| Hex: Pentimento | The Artist | Regression | Totem re-ignition | Relight dull totems for regression and repair slow | Advanced | Totem-heavy snowball builds |
| Scourge Hook: Gift of Pain | The Nemesis | Regression | Heal and repair slow | Scourge hook unhook = -16% heal, -8% repair until healed | Intermediate | Tunnel-free slowdown |
| Trail of Torment | The Executioner | Stealth | Kick undetectable | Undetectable until Survivor sees regressing gen | Beginner | Approach mindgames |
| Dead Man’s Switch | The Deathslinger | Regression | Post-hook block | Blocks released gens for 45s after hook | Beginner | Scourge Hook combos |
| Oppression | The Trickster | Regression | Chain kick | Kick one gen, regress 3 random gens | Beginner | Map-wide pressure on large maps |

Regression and Slowdown Perks
Regression perks are the spine of every viable Killer build because 5 gens at 90 seconds each = 450 seconds of base repair time, and competitive Survivor teams can compress that to under 4 minutes without slowdown pressure. Pop Goes the Weasel removes 30% of current gen progress on kick, which is the single most efficient burst regression in the game. A Survivor repairing a gen to 80% and getting chased off watches Pop erase 24% of that progress in one animation, and the perk has no cooldown beyond the required hook trigger.
Scourge Hook: Pain Resonance is the current post-nerf workhorse at 10% regression on the highest-progress gen on first use per Scourge Hook, with diminishing tokens per subsequent use. It stacks perfectly with Pop because Pain Res fires on hook and Pop fires on your next kick, so one hook event generates 10% plus 30% of the highest gen and a second gen. The Pain Res + Pop combo is the universal baseline of modern Killer builds.
Jolt (formerly Surge) fires -8% on all gens within 32m of a down, turning M1 Killer chases near gen clusters into free regression events. Call of Brine regresses a kicked gen at 200% speed for 60 seconds and pulses an aura alert on any skill check the Survivor fails, functioning as a defensive three-gen anchor. Overcharge triggers a difficult skill check on the first Survivor to touch a kicked gen, which pairs with Call of Brine and Eruption for layered skill check punishment.
Eruption was the meta-defining perk before its nerf, previously incapacitating Survivors for 25 seconds after a down while exploding kicked gens. Post-nerf it still regresses 10% on kicked gens when you down someone, and the incapacitate was removed but the regression value remains solid. Ruin’s 100% passive regression while unattended is the hard-carry perk for mobile Killers (Nurse, Blight, Spirit) who can punish Survivors away from gens fast enough to let Ruin work.
Corrupt Intervention blocks the three farthest gens from your spawn for 120 seconds at match start, which is the universal setup Killer perk. Trapper, Hag, and Artist all need uninterrupted early-game to plant trap/totem/crow coverage, and Corrupt delivers exactly that. Deadlock blocks the highest-progress gen for 30 seconds after a gen completes, so popping a gen immediately locks the gen the other Survivor team was going to pivot to. Dead Man’s Switch blocks any gen a Survivor releases after a hook for 45 seconds, which combined with Pain Resonance forces a Survivor-wide hard stop on all repair momentum at every hook event.

Tracking and Information Perks
Tracking perks answer the question, where are the other three Survivors when I can only see one. BBQ & Chili shows Survivor auras outside 40m of the hook for 4 seconds on every hook event, which lets you route toward the next chase instantly. The bloodpoint bonus was removed in a past patch, but the aura information alone justifies the perk slot for every Killer above Trapper tier.
Lethal Pursuer reveals all four Survivor auras at match start for 9 seconds, which guarantees a first chase within 20 seconds of the trial loading. It also extends every other aura-read in your build by +2 seconds, so Lethal + BBQ shows auras for 6 seconds instead of 4, and Lethal + Nowhere to Hide reads 24m for 14 seconds instead of 12. The stacking makes Lethal one of the highest-value passive perks in the game.
Whispers activates within 32m of any Survivor and stays active as long as one is in range. It is the premier hatch-search perk because the hatch spawns within the last-Survivor cone and Whispers tells you when you’re close. Nowhere to Hide reveals Survivor auras within 24m of a kicked gen for 12 seconds (14s with Lethal), which means Kick + Look during three-gen defense is free information every 12 seconds.
I’m All Ears reads the Survivor aura for 6 seconds after a fast vault with a 60-second cooldown, letting you pre-fire a power through a wall because you know exactly where they are. Floods of Rage shows all Survivor auras for 5 seconds on unhook, Bitter Murmur reads all auras for 5 seconds on gen completion (5 gens = 5 aura reads plus endgame), and A Nurse’s Calling shows Survivors healing within 28m, which converts into easy grabs.
Discordance highlights any gen with 2+ Survivors within 96m for 8 seconds after they join up, directly countering Prove Thyself stacks. Tinkerer grants undetectable and aura alert when a gen reaches 70%, giving stealth approaches on near-complete gens. Face the Darkness forces injured Survivors to scream on a timer, revealing them across the map and countering Iron Will entirely.
Chase and Anti-Loop Perks
Chase perks determine how fast you convert first-chase into first-hook. Bamboozle grants +15% vault speed and blocks the window you vaulted for 8 seconds, which surgically removes infinite loops at Ironworks, Father Campbell’s, and similar main-buildings. Every Killer should consider Bamboozle on indoor-window-heavy maps, and some Killers (Clown, Cenobite, Twins) run it permanently.
Brutal Strength adds +20% to pallet and breakable wall break speed, which shaves half a second off every pallet stun and cascades across a full match into real loop-closure value. Spirit Fury auto-breaks a pallet after 4 pallet stuns (recharging), which pairs with Enduring’s -50% stun duration to create the Enduring + Spirit Fury chase-through-pallet combo that breaks safe pallet loops entirely.
Fearmonger applies exhaustion and blindness to any Survivor repairing a gen, turning Sprint Burst and Lithe Survivors into 100%-speed targets when you catch them on gens. Coup de Grace stores tokens on gen completions and grants +80% lunge distance on the next attack, which turns tile windows and pallets into confident downs.
Save the Best for Last stacks up to 8 tokens at -5% attack cooldown per token (-40% total) by hitting non-obsession Survivors, and then drops tokens on obsession hits. Managed properly on Myers, Trapper, or Ghost Face, SBFL delivers faster M1 swings than any other perk in the game, and it is the mechanical core of obsession-avoidant builds. Forced Hesitation applies hindered to all Survivors within 12m of a downed Survivor on pickup, turning altruism saves into failed plays.
Snowball and Hook Pressure Perks
Snowball perks convert one down into a cascade. Make Your Choice exposes the unhooking Survivor for 60 seconds if the unhook happens 32m+ from you, which is the anti-altruism insurance. A Survivor who pulls their teammate off a hook while you patrol gens eats a one-shot exposed state, which means they go down instantly on your next hit and you are back at 2 hook states fast.
Hex: Devour Hope builds tokens every time a Survivor is unhooked 24m+ from you, hitting 1/2/3/4/5 tokens for hindered, exposed, exposed, mori-able, and mori-able with movement buffs. Stacked Devour is a match-ending snowball because once you hit 3 tokens, every Survivor is one-shot-exposed while the totem stands. The counter is totem cleansing, but Devour is hard to find if you play around the totem carefully.
Grim Embrace blocks all gens for 40 seconds after 4 unique hooks, which is a pressure pause that lets you cement a down while no gens can progress. Pain Resonance does hook-based snowball too at 10% highest-gen regression per unique hook. Rancor makes the obsession exposed and mori-able at endgame with gradual aura reveal as gens complete, and the obsession-mori often ends a match before exit gates can power.
Blood Warden blocks the exit gates for 40 seconds after hooking someone in the endgame when gates are open, turning a near-escape into a four-stack kill trade when paired with NOED or Devour. NOED (Hex: No One Escapes Death) exposes all Survivors when a dull totem spawns at the 5-gen complete moment, and although Small Game and Detective’s Hunch counter it, plenty of matches reach endgame with NOED live and the Killer picks up 2-3 extra hook states on the way to 4K.
Stealth, Map Control, and Denial Perks
Trail of Torment grants undetectable after kicking a gen until a Survivor sees the regressing gen. Paired with Surveillance, you kick a gen, walk into stealth, patrol off the gen, and approach the next one silently. The combo is the primary counter to Spine Chill and Premonition because undetectable removes the terror radius that triggers those perks.
Tinkerer grants undetectability and a gen aura at 70% progress, and combined with Pop Goes the Weasel, the stealth-approach-pop loop is devastating. Dragon’s Grip exposes the first Survivor to interact with a kicked gen for 60 seconds, creating trap-like denial on three-gen clusters. Hex: Plaything makes the unhooked Survivor oblivious to your terror radius until they cleanse the attached totem, which synergises with every stealth Killer (Wraith, Ghost Face, Myers, Dredge).
Hex: Pentimento relights dull totems for layered regression and repair-slow effects stacking up to -20% repair speed per lit totem. Combined with Plaything, Devour, and totem-hunt punishment, the Hex-stack build is a legitimate alternative to pure regression meta. Hex: Face the Darkness periodically screams injured Survivors for 2-4 seconds based on token count, revealing them across the map and breaking Iron Will. These denial perks change how Survivors play the match rather than directly regressing gens, and they often compress match time indirectly by forcing repair breaks.

Best Dead by Daylight Survivor Perks for Different Playstyles
| Playstyle/Goal | Recommended Survivor Perks | Why They Fit | Skill Floor |
|---|---|---|---|
| Beginner | Windows of Opportunity, Kindred, Bond, Self-Care | Teaches loop structure, team awareness, altruism timing, and basic sustain without advanced trigger conditions | Low |
| Solo Queue | Kindred, Bond, Off The Record, Deja Vu | Replaces voice comms with aura reads, protects post-unhook, denies three-gens | Low-Medium |
| Team Support | We’ll Make It, Prove Thyself, Leader, Botany Knowledge | Stacks heal speed and repair speed for the altruism-heavy medic role | Low |
| Chase-Focused | Sprint Burst, Windows of Opportunity, Resilience, Off The Record | Maximum chase extension with exhaustion, resource awareness, injured speed, anti-tunnel | Medium-High |
| Stealth-Focused | Iron Will, Calm Spirit, Quick and Quiet, Dance With Me | Full audio and scratch mark suppression for hide-and-seek play | Medium |
| Objective-Focused | Hyperfocus, Stake Out, Deja Vu, Resilience | Gen rush through skill check optimisation and injured speed | High |
| Anti-Tunnel | Off The Record, Decisive Strike, Unbreakable, Dead Hard | Three layers of anti-tunnel plus exhaustion distance | Medium |
| Endgame Specialist | Adrenaline, Hope, No One Left Behind, Wake Up | Endgame movement, altruism speed, gate opening, one-state heal on 5th gen | Low |
| Information Build | Kindred, Bond, Empathy, Open-Handed | Full-map Survivor visibility for team routing | Low |
| Slug Recovery | Unbreakable, Tenacity, Soul Guard, Boil Over | Slug-proof build for anti-slug Killer pools | Medium |
The builds above are not locked templates but starting points. Veteran Survivors swap individual slots based on map offerings (Balanced Landing on Haddonfield, Small Game if totems are in play), Killer reads (Spine Chill for stealth Killers, Calm Spirit for Doctor), and queue context (Kindred on solo queue, Prove Thyself on SWF). For a deeper breakdown of the top Survivor loadouts, check our dedicated guide on the best survivor perks for every patch.
Best Dead by Daylight Killer Perks for Different Playstyles
| Playstyle/Goal | Recommended Killer Perks | Why They Fit | Skill Floor |
|---|---|---|---|
| Beginner | Corrupt Intervention, Jolt, BBQ & Chili, Lethal Pursuer | Early-game block, passive regression, post-hook routing, match-start aura | Low |
| Snowball-Focused | Make Your Choice, Pain Resonance, Grim Embrace, NOED | Hook pressure, spread-hook block, endgame exposed closure | Medium |
| Chase-Dominant | Bamboozle, Spirit Fury, Enduring, Save the Best for Last | Window denial, pallet-break cascade, attack cooldown on non-obsession | Medium-High |
| Regression-Stacked | Pop Goes the Weasel, Pain Resonance, Deadlock, Corrupt Intervention | Universal four-slot regression meta | Low |
| Information-Heavy | BBQ & Chili, Lethal Pursuer, Nowhere to Hide, I’m All Ears | Match-start, hook, kick, and chase aura reads | Low |
| Map Control (Three-Gen) | Call of Brine, Overcharge, Surveillance, Nowhere to Hide | Gen-defense anchor plus aura reads when kicking | Medium |
| Stealth Killer | Trail of Torment, Tinkerer, Hex: Plaything, Pop Goes the Weasel | Undetectable approaches with regression on gen completion | Medium |
| Hex Stack | Hex: Devour Hope, Hex: Ruin, Hex: Plaything, Hex: Pentimento | Four Hex totems with Pentimento relight loop | Advanced |
| Endgame Closer | NOED, Blood Warden, Rancor, No Way Out | Exit gate lockdown, exposed endgame, obsession mori | Medium |
| Anti-Heal | Sloppy Butcher, A Nurse’s Calling, Gift of Pain, Hemorrhage | Prolonged injuries and heal interruption | Low |
Killer perk selection scales directly with Killer power. Nurse, Blight, and Spirit want different perks than Trapper, Hag, and Myers because mobility determines whether passive regression like Ruin actually applies pressure. For mobility-poor Killers, setup perks like Corrupt, Deadlock, and Pain Resonance outperform Ruin because they don’t require you to chase Survivors off gens within the regression window. If you want to accelerate learning these builds, our guide on how to learn how to use Elocarry DBD cheats covers the tools that compress the bloodpoint grind.
How Perk Choice Affects Match Strategy
Perks interact with each other through synergy rules that compound individual perk value into build value. A single strong perk gives you +1 axis of pressure, but two synergised perks give you +3 axis of pressure because the trigger conditions reinforce each other. The table below breaks down the most important synergies on both sides of the match.
| Perk A | Perk B | Role | Synergy Explanation | Best Match Condition |
|---|---|---|---|---|
| Decisive Strike | Off The Record | Survivor | DS handles pickup tunnel, OTR handles chase tunnel, layered anti-tunnel | Tunnel-heavy Killer (Hillbilly, Bubba, Myers) |
| Windows of Opportunity | Dead Hard | Survivor | Windows shows pallets, Dead Hard extends to reach them | Against any mobile Killer on loop-rich maps |
| Prove Thyself | Deja Vu | Survivor | Prove stacks repair, Deja Vu prioritises three-gens for Prove stacking | SWF and coordinated solo queue |
| Hyperfocus | Stake Out | Survivor | Stake Out auto-converts goods to greats, Hyperfocus stacks great bonuses | Low-pressure matches where you gen-tick reliably |
| Adrenaline | Hope | Survivor | Adrenaline heal and sprint at 5-gen, Hope permanent speed in endgame | Endgame-heavy matches and hatch builds |
| Iron Will | Dance With Me | Survivor | No audio + no scratch marks after vault = full stealth break | Against audio-reliant Killers (Spirit, Huntress, Nurse) |
| Pop Goes the Weasel | Pain Resonance | Killer | Pain Res on hook, Pop on next kick, dual regression from one event | Every modern meta build |
| BBQ & Chili | Lethal Pursuer | Killer | Lethal extends BBQ duration, Lethal opens match, BBQ extends every hook | All Killers with mobility to route on aura info |
| Bamboozle | Spirit Fury | Killer | Bamboozle closes windows, Spirit Fury closes pallets | Main-building maps and pallet-heavy loops |
| Enduring | Spirit Fury | Killer | Enduring reduces stun, Spirit Fury auto-breaks pallet, run-through-pallet chase | Pallet-dense maps (The Game, Asylum) |
| Trail of Torment | Surveillance | Killer | Kick = undetectable + aura on gen touch, stealth patrol loop | Three-gen matches and indoor maps |
| Hex: Plaything | Hex: Pentimento | Killer | Plaything hexes unhooked Survivors, Pentimento relights cleansed totems | Hex-stack builds with totem hunt punishment |
| NOED | Blood Warden | Killer | NOED exposes at endgame, Blood Warden seals gates on hook | Endgame closer builds on slow Killers |
| Make Your Choice | Pain Resonance | Killer | Far unhook exposes, pick up the exposed, hook for Pain Res trigger | Spread-hook pressure builds |
| Dragon’s Grip | Surveillance | Killer | Kick exposes on touch, Surveillance shows the touch | Three-gen setups |
| Nowhere to Hide | Lethal Pursuer | Killer | Lethal extends Nowhere to 14s range, kick + look = full-map read | Any Killer defending three-gens |
Solo Queue vs Coordinated Play: Which Perks Gain More Value?
The same perk can be tier-1 in solo queue and tier-3 in SWF because voice comms change what information is redundant. Kindred in a four-stack SWF is useless because the team is already telling each other over voice where the Killer is. Kindred in solo queue is top-tier because it replaces the exact information the team would have had with voice.
| Perk | Role | Solo Queue Value | Coordinated Value | Why the Difference Matters |
|---|---|---|---|---|
| Kindred | Survivor | S-Tier | C-Tier | Replaces voice comms on hook proximity; SWF already knows |
| Bond | Survivor | A-Tier | B-Tier | Prevents chase-pulling teammates; SWF coordinates position |
| Prove Thyself | Survivor | B-Tier | S-Tier | Needs coordinated stacking on the same gen |
| Hyperfocus | Survivor | A-Tier | S-Tier | Gen rush only matters if the team can coordinate leaves |
| Empathy | Survivor | A-Tier | C-Tier | SWF already reports chase states over voice |
| Off The Record | Survivor | S-Tier | A-Tier | Solo queue needs personal anti-tunnel; SWF has body blockers |
| Decisive Strike | Survivor | S-Tier | B-Tier | Solo can’t trust teammates to bodyblock slugs |
| Deja Vu | Survivor | S-Tier | A-Tier | Three-gen call-outs are free in SWF |
| BBQ & Chili | Killer | S-Tier | S-Tier | Aura info beats voice comms; both queues same value |
| Discordance | Killer | B-Tier | S-Tier | Counters coordinated gen stacks that solo queue doesn’t make |
| Make Your Choice | Killer | A-Tier | S-Tier | SWF altruism timing is tighter, more MYC triggers |
| Hex: Plaything | Killer | S-Tier | A-Tier | Solo queue can’t communicate totem location to unhooked Survivor |
| Nowhere to Hide | Killer | S-Tier | S-Tier | Reads gen campers in both queues |
| Floods of Rage | Killer | A-Tier | S-Tier | SWF unhooks are tightly timed, aura reads show clusters |

The rule of thumb across queue types: solo Survivors prioritise information and personal safety, SWF Survivors prioritise team tempo and objective compression. Killers above MMR 1500 should assume SWF at least 40% of the time and build accordingly with Discordance, Make Your Choice, Floods of Rage, and regression that punishes coordinated gen stacking.
Best Dead by Daylight Perks for Beginners
| Experience Level | Recommended Survivor Perks | Recommended Killer Perks | What They Teach Well |
|---|---|---|---|
| Complete Beginner | Windows of Opportunity, Kindred, Self-Care, Adrenaline | Corrupt Intervention, Whispers, Jolt, Bamboozle | Survivor: loop structure, team awareness, sustain, endgame clutch. Killer: early setup, proximity tracking, passive regression, window denial |
| Early Intermediate | Sprint Burst, Bond, We’ll Make It, Off The Record | Pop Goes the Weasel, BBQ & Chili, Lethal Pursuer, Brutal Strength | Survivor: exhaustion management, altruism timing, post-unhook value. Killer: regression burst, post-hook routing, match-start aura, break speed |
| Developing Player | Dead Hard, Resilience, Prove Thyself, Deja Vu | Pain Resonance, Nowhere to Hide, Make Your Choice, Deadlock | Survivor: mechanical chase extension, injured speed, gen stacking, three-gen denial. Killer: hook-based regression, gen-defense aura, altruism punish, gen-complete block |
Beginner builds should prioritize perks that activate automatically or on simple triggers, which is why Windows, Kindred, Self-Care, Corrupt, Whispers, Jolt, and Bamboozle appear in the complete beginner rows. As you develop pattern recognition on both sides, rotate toward perks with conditional triggers and synergy dependencies. The mechanical skill floor of a modern Dead By Daylight loadout sits higher than it did pre-6.1.0 because Dead Hard’s rework, Ruin’s nerf, and Eruption’s rework all removed low-effort value, so intentional build construction matters more than in previous patches.

Dead by Daylight Perk Tips for Beginners
- Run Windows of Opportunity for your first 50 Survivor matches. It teaches pallet locations, loop structure, and tile connectivity faster than any other single tool in the game, and the 32m aura radius means you learn map layouts passively.
- Kindred is non-negotiable in solo queue until you have 200+ hours. It replaces the voice comms that SWF teams have by default, and the 16m Killer aura reveal around hooks tells you whether the Killer is camping (which means don’t rescue yet) or gone (which means go now).
- On Killer, Corrupt Intervention buys 120 seconds of setup time by blocking the three farthest gens at match start. Use that window to patrol your gen cluster, scout the obsession, and land a first-chase before Survivors can split across the map.
- BBQ & Chili on Killer shows Survivor auras 40m+ from the hook for 4 seconds. After every hook, immediately turn and look at the map, identify the closest aura, and start moving. Routing on aura info is the difference between 8-hook matches and 12-hook matches.
- Do not stack four regression perks. One regression slot, one information slot, one chase slot, and one utility slot is a balanced build. Quadruple regression fails because you still need to find Survivors to trigger the regression, and no information means you can’t find them.
- Exhaustion perks share a 40-second cooldown category on Survivor, so you can only run one active exhaustion perk profitably. Sprint Burst + Lithe is legal but redundant because only one will be up at any given time after the first activation.
- Hex perks are high-variance. Hex: Ruin, Hex: Devour Hope, and Hex: NOED all die the moment their totem is cleansed. Run Undying (now reworked into totem-hiding mechanics) or Pentimento to protect your Hex value, and never stack four Hexes without totem protection.
- Off The Record is the modern default anti-tunnel Survivor perk. At 80 seconds of endurance post-unhook with no scratch marks and no grunts of pain, it covers the window where tunneling actually happens and pairs with Dead Hard’s new 60-second activation requirement.
- Prestige characters to Prestige 3 only when you want the teachables on the full roster. If you are learning one character, staying at Prestige 0 and levelling the bloodweb through the meta tiers is faster bloodpoint-to-perk conversion than prestiging aggressively.
- Match your perks to the Killer you face, not the Killer you expect. Check the lobby Killer icon on the loading screen Killer side, and against stealth Killers (Wraith, Ghost Face, Myers) run Spine Chill. Against audio-heavy Killers (Spirit, Nurse, Oni) run Iron Will. Against the Doctor, run Calm Spirit.
- Run Lethal Pursuer on every Killer for your first 100 hours. The 9-second match-start aura read forces you to engage immediately, which teaches chase fundamentals. The +2 seconds to every other aura read also stacks with BBQ, Nowhere to Hide, and I’m All Ears for bigger reads on every subsequent pickup.
Why Understanding Dead by Daylight Perks Matters
Perks are the largest mechanical lever a Dead by Daylight player controls between matches. Map offerings randomise, Killer matchmaking is opaque, and Survivor queue composition is unpredictable, but your four perk slots are completely deterministic and completely under your control. A player who treats perk selection as a scouting-based counterpick decision rather than a cosmetic choice gains 10-15% match win rate over a player who runs the same loadout every game, and that compounds across thousands of matches into the difference between Silver and Iridescent ranks.
The perk system also teaches the game’s deeper mechanical layers by surfacing them as active effects. Running Windows of Opportunity for 50 matches makes you internalise pallet locations so thoroughly that you can drop the perk and loop from memory. Running Whispers teaches the 32m proximity boundary, which tunes your map patrol cadence. Running Prove Thyself teaches gen stacking risk-reward because you see the speed boost turn into a Killer ambush target. Perks are not just tools, they are training wheels for the mechanical literacy that defines top-tier play.
The meta shifts patch-to-patch. Patch 6.1.0 rewrote Dead Hard, Ruin, and basekit unhook mechanics. Patch 7.0 nerfed Eruption and reworked the core gen regression system to cap per-gen regression events. The 2024 patches introduced Anti-Face-Camp, reworked Decisive Strike, and returned Scourge Hook perks. Every meta shift forces a loadout rebuild, and players who understand the underlying perk categories (regression, tracking, chase, snowball, information, anti-tunnel) adapt in 3-5 matches, while players who memorise specific perk rankings without category understanding fall behind for weeks after every balance patch.
Finally, perks are the bridge between Survivor roleplay preference and mechanical viability. A stealth-focused Survivor who loves Iron Will + Calm Spirit + Quick and Quiet + Dance With Me expresses their playstyle through the perk loadout, and the perk system rewards the commitment with consistent mechanical value. A chase-focused Survivor expresses the same preference with Sprint Burst + Dead Hard + Windows + Resilience. The same game supports both playstyles because the perk system provides the tools to specialise, and understanding the tools is what separates casual play from build-expressive play.
Dead by Daylight Perks FAQs
What are perks in Dead by Daylight?
Perks are passive and active abilities equipped into four loadout slots per character, with each Survivor and Killer unlocking three unique perks and the remainder accessible through the Bloodweb and Shrine of Secrets. Perks activate on specific triggers (unhook, skill check, gen completion, hit, hook) and scale in value with tier 1, 2, and 3 investments. The perk system is the largest build-defining mechanical layer in the game, directly shaping how chases, repairs, and hook pressure resolve across every match.
What is the difference between Survivor perks and Killer perks?
Survivor perks live in a pool of 130+ perks focused on chase survival, team coordination, generator speed, anti-tunnel protection, and information. Killer perks live in a separate pool of 120+ perks focused on generator regression, tracking auras, chase dominance, hook pressure, and endgame lockdown. The two pools are completely isolated, you cannot equip Survivor perks on a Killer or vice versa, and each side’s perk design reflects the asymmetric 4v1 structure where Survivors need coordination and Killers need pressure.
What are the best Survivor perks in Dead by Daylight?
The current top-tier Survivor perks are Windows of Opportunity (information), Off The Record (anti-tunnel), Sprint Burst (exhaustion chase), Kindred (solo queue coordination), Prove Thyself (gen stacking), Deja Vu (three-gen denial), Adrenaline (endgame clutch), Resilience (injured speed), We’ll Make It (post-unhook healing), and Hyperfocus (skill check gen rush). The exact ranking shifts patch-to-patch, but these ten perks have held meta relevance across multiple balance cycles.
What are the best Killer perks in Dead by Daylight?
The current top-tier Killer perks are Pop Goes the Weasel (kick regression), Scourge Hook: Pain Resonance (hook regression), BBQ & Chili (post-hook aura), Lethal Pursuer (match-start aura and extender), Corrupt Intervention (early-game block), Deadlock (gen-completion block), Nowhere to Hide (kick aura read), Pentimento (totem regression), Grim Embrace (hook block), and Make Your Choice (altruism punish). Regression dominates the list because generator speed is the hardest pressure vector to stabilize without dedicated slots.
Which Dead by Daylight perks are best for beginners?
Beginner Survivors should run Windows of Opportunity, Kindred, Self-Care, and Adrenaline. These perks teach loop structure, team coordination, sustain, and endgame clutch plays with zero conditional triggers. Beginner Killers should run Corrupt Intervention, Whispers, Jolt, and Bamboozle. These perks teach setup time, proximity detection, passive regression, and window closure without requiring complex build synergies.
Do perks matter more than characters in Dead by Daylight?
On the Survivor side, perks matter overwhelmingly more than character choice because all Survivors have identical hitboxes, speeds, and skill check patterns, with only perks and cosmetics distinguishing them mechanically. On the Killer side, perks and character power share importance roughly 50/50 because each Killer has a unique power (Nurse blinks, Huntress hatchets, Pyramid Head ranged attack) that defines the chase fundamentally, but perks still determine regression pressure, tracking, and endgame dominance.
Are teachable perks still important in Dead by Daylight?
Teachable perks are essential because they let you equip any perk on any character in your role once unlocked via Prestige 1 or higher. A Windows of Opportunity teachable from Kate Denson is equippable on every other Survivor after unlock, which means prestiging the characters whose perks you want propagates those perks across your entire roster. The Shrine of Secrets also sells random teachable perks weekly for Iridescent Shards, providing an alternative acquisition path.
Which perks are best for solo queue?
Solo queue Survivors gain the most value from Kindred, Bond, Off The Record, Deja Vu, Windows of Opportunity, and Empathy because these perks replace the voice comms coordination that SWF teams have for free. Kindred reveals hook and Killer aura, Bond shows nearby teammates, OTR covers anti-tunnel independently, Deja Vu forces three-gen awareness, Windows teaches loops, and Empathy reports injured teammate locations. These perks compensate for the information vacuum that solo queue inherits from lack of voice.
How do you unlock more perks in Dead by Daylight?
You unlock perks through three primary paths. First, level each character’s Bloodweb to access their unique teachable perks at level 40. Second, prestige a character to Prestige 1 to distribute their teachables across the Bloodweb of all other characters in the same role. Third, purchase teachable perks from the Shrine of Secrets (a weekly-rotating shop) using Iridescent Shards earned through playing the game. All three paths compound and the goal is a full roster of all perks unlocked across all characters.
Can you use any perk on any character in Dead by Daylight?
Yes, any perk can be equipped on any character within the same role once you have unlocked it either through playing the original character, unlocking via teachables after prestige, or purchasing from the Shrine of Secrets. A Kate Denson perk like Windows of Opportunity can be equipped on Dwight, Meg, Claudette, or any other Survivor. A Cenobite perk like Deadlock can be equipped on any Killer. The only constraint is that Survivor perks remain Survivor-only and Killer perks remain Killer-only, so the two pools never mix.