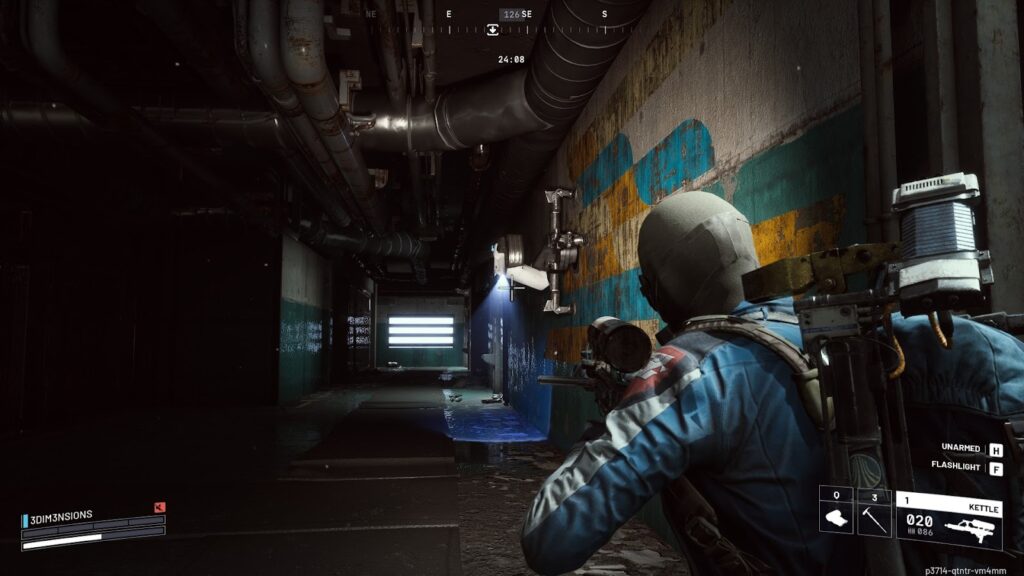
Every machine in ARC Raiders behaves differently, attacks from different angles, punishes different mistakes, and rewards different responses. Recognising what is approaching within the first second of contact changes everything about the encounter. It changes positioning. It changes weapon selection. It changes whether the fight should happen at all. In a PvPvE extraction shooter where every engagement costs ammunition, creates noise that attracts more threats, and adds time that delays extraction, the ability to read an enemy before the engagement starts is one of the most practical skills a player can develop.
This is not a lore breakdown or a wiki-style roster list. It is a mechanics-first guide built around recognition, threat assessment, weak-point targeting, and the tactical decisions that each enemy type makes during real raids. The goal is not memorising names and health pools. The goal is understanding how each enemy changes the encounter, where the weak points sit, and whether the correct response is to fight, reposition, or avoid contact entirely. Some enemies are manageable enough to clear without much thought. Others demand full attention, or they end the raid. Knowing the difference before committing to a fight is how experienced players extract consistently, while newer players lose runs to encounters that could have been handled differently.

What Are Enemy Types In ARC Raiders?
ARC Raiders feature multiple classes of hostile machines, each designed with distinct movement patterns, attack behaviours, detection methods, and weak-point layouts. These are not reskins of the same enemy at different sizes. A Tick rushing through an interior corridor requires a fundamentally different response than a Rocketeer pinning a player behind cover with explosive rounds, and both demand something completely different from a Queen encounter that reshapes the entire raid around its patrol area.
The most useful way to categorise ARC enemies is by gameplay function rather than individual name. In the middle of a raid, nobody pauses to look up which specific machine is approaching. Movement type, size, speed, and behaviour are the signals that reach the player first, and those signals map to categories that dictate response. Swarm enemies mean quick reactions and close-range weapons. Flying enemies mean cover discipline and vertical awareness. Heavy ground machines mean sustained damage output and deliberate weak-point targeting. Boss encounters mean a strategic decision about whether the fight is worth taking at all given the current loadout, resources, and extraction timeline.
Understanding an enemy goes beyond its silhouette. It means knowing where the weak spots are and when they become accessible, what range the enemy fights at most effectively, how terrain changes the encounter, and what audio cues signal its presence before visual confirmation. ARC machines produce distinct sounds as they move, activate, and prepare attacks. Learning those sounds allows preparation before the engagement begins rather than reaction after the player is already in danger. That preparation time is the difference between a clean kill that costs six rounds and a drawn-out fight that burns through a magazine and announces the position to every other threat in the area.

A Quick Overview Of ARC Raiders Enemy Types
Before the detailed category breakdowns, this table provides a fast reference for the full roster. Use it to identify an enemy on contact, understand its primary danger, locate the weak spot, and determine whether to fight or reroute. The deeper analysis follows in the sections below, but this table serves players who need immediate value.
| Enemy | Category | Mobility | Main Danger | Weak Spot | Fight / Avoid |
|---|---|---|---|---|---|
| Tick | Ambush | Fast, low, swarm behaviour | Stacking damage in tight spaces | Body (fragile) | Kill immediately before they accumulate |
| Pop | Ambush | Fast, erratic approach | Explosive proximity detonation | Body (destroy before contact) | Shoot on sight, never let it close |
| Fireball | Ambush | Rolling accelerates downhill | Fire damage on contact | Body (one-shot capable) | Listen for the roll, shoot before visual |
| Snitch | Recon | Moderate, evasive when alerted | Calls reinforcement waves | Body (kill fast) | Highest priority in any mixed encounter |
| Surveyor | Recon | Airborne, slow scan | Detection triggers pursuit escalation | Body | Destroy before scan lock completes |
| Wasp | Flying | Airborne, hovering stance | Ranged harassment from above | Rear thrusters | Manageable alone, dangerous grouped |
| Hornet | Flying | Airborne, aggressive | Stronger ranged burst damage | Rear thrusters | Break the line of sight if multiples engage |
| Firefly | Flying | Aggressive pursuit, closes fast | Gas release on proximity or death | Gas tank (rear, one-shot potential) | Target the gas tank before it reaches you |
| Rocketeer | Flying | Holds range, explosive fire | Heavy splash damage at distance | Exposed panels during the attack wind-up | Hard cover immediately, fight from angles |
| Leaper | Heavy | Fast lunging attacks | Rapid gap closing punishes static players | Leg joints during lunge recovery | Maintain spacing, target legs between lunges |
| Bastion | Heavy | Slow, heavily armoured | Sustained fire and area denial | Leg joints and rear panels after armour strip | Flank with a squad or avoid entirely solo |
| Bombardier | Heavy | Moderate positions for barrage | Explosive barrage covering wide areas | Leg joints between barrage cycles | Close the distance fast, or use a hard cover |
| Comet | Heavy | Moderate, armoured shell | Tanky exterior rewarding sustained aggression | Internals exposed when the shell opens under fire | Sustained automatic fire forces it open |
| Shredder | Heavy | Aggressive forward pressure | Devastating close-range damage | Rear canisters and leg joints | Kite at range, never engage in tight spaces |
| Queen | Boss | Large patrol area, multi-phase | Multi-threat encounter with add spawns | Legs and face (armour strip), then core | Strategic decision, not a default engagement |
| Matriarch | Boss | Large, area-controlling | Heavy damage, spawn pressure, area denial | Legs and face (armour strip), then core | Requires a prepared squad; avoid if under-resourced |

ARC Raiders Enemy Types By Category
A flat alphabetical list is useful as a reference, but it does not help during a fight. This section breaks the roster into practical gameplay categories based on how enemies actually affect combat flow. Each category represents a type of threat that demands a specific response, and understanding that response before the encounter begins is what separates clean fights from chaotic, resource-draining ones.
Close-Range Ambush Enemies
Ticks, Pops, and Fireballs are the smallest enemies in ARC Raiders, and they are consistently underestimated by players who assume small means harmless. Individually, any one of these machines is a minor threat. A single Tick dies to one shot. A Pop can be destroyed before it reaches detonation range. A Fireball can be spotted and eliminated during its rolling approach. The danger is not in their individual capability. The danger is in context.
These enemies punish poor spatial awareness and bad timing. Ticks appear in clusters, often in interior spaces where movement is restricted and escape routes are limited. Walking into a room full of Ticks while reloading or mid-animation looting a container turns a minor threat into genuine damage. Pops add explosive pressure to that equation. A single Pop detonating at close range does meaningful health damage, and in a room where Ticks are already swarming, the Pop explosion turns a manageable situation into a crisis that burns through healing. Fireballs close the distance with a rolling motion that accelerates on downhill terrain, arriving faster than expected if the approach angle favours them.
What makes ambush enemies truly dangerous is layering. These smaller threats become significantly worse when they appear during a fight already in progress against a heavier enemy. A Bombardier barrage is challenging on its own. A Bombardier barrage while Ticks are swarming at close range, and a Pop is closing from behind, is a completely different problem. This layering effect is one of the primary ways ARC Raiders escalates combat difficulty without simply increasing health pools.
- Audio is the primary warning system. Ticks produce a distinctive skittering sound. Pops make an erratic movement noise. Fireballs generate a rolling mechanical sound. All three are audible before visual contact in most environments. Hearing them means stopping looting and addressing the threat before it reaches melee range.
- Clear rooms before committing to interactions. Opening a container, breaching a locked door, or interacting with an objective locks the player into an animation. If Ticks or Pops are in the room, that animation is a death sentence.
- React immediately. These enemies are fragile. One or two shots kill any of them. The damage comes from hesitation, not from the enemy being hard to kill.
Indoor spaces amplify the threat. Open ground gives room to the kite and creates distance. Tight corridors and small rooms do not. Urgency scales with how confined the space is.
Recon And Support Enemies
Snitches and Surveyors do not deal the most serious damage in any encounter, but they are responsible for more failed raids than most players realise. These enemies escalate fights. A Snitch that completes its reinforcement call turns a two-enemy patrol into a sustained wave of incoming threats. A Surveyor that locks onto a player’s position can trigger pursuit chains that follow across sections of the map. The damage they cause is indirect, but the effect on the raid is immediate and cascading.
The Snitch is the single most important target priority call in ARC Raiders. When a Snitch appears in a mixed group of enemies, killing it before its call animation completes should be the first action taken, regardless of what else is shooting. A Leaper charging from the front is dangerous but manageable. A Leaper charging from the front while a Snitch summons three more enemies from behind is a situation that spirals beyond recovery. The Snitch call has a visible and audible wind-up, and that window is the opportunity. If the call completes, the player is fighting a larger group in a position they did not choose, with resources they did not plan to spend.
Surveyors operate differently but produce a similar escalation effect. They scan areas from an airborne position, and detection triggers increased aggression and pursuit from nearby ARC units. The result is not an immediate reinforcement wave as the Snitch produces, but a sustained increase in pressure that makes the operating area more hostile for an extended period. Destroying a Surveyor before its scan completes prevents this escalation entirely.
| Enemy | What It Enables | Why It Matters | Kill Priority | Best Timing To Engage |
|---|---|---|---|---|
| Snitch | Calls reinforcement waves to the player’s exact position | Transforms a manageable fight into a sustained multi-threat encounter | Highest in any mixed group, no exceptions | During the call, wind-up animation before reinforcements are triggered |
| Surveyor | Area-wide detection and pursuit escalation | Makes the surrounding area more hostile for an extended period | High, especially when entering a new area of the map | Before the scanning lock completes on the player’s position |
The practical rule for recon and support enemies is to kill them first. In a mixed encounter with a heavy enemy, a Snitch, and a few smaller threats, the Snitch dies first. Always. The heavy enemy is not going anywhere. The Snitch’s reinforcement call is on a timer, and once it completes, the problem doubles. Target priority is the core lesson of this enemy category, and players who internalise it consistently perform better in chaotic multi-enemy encounters.
Flying Pressure Enemies
Aerial ARC units force a type of awareness that ground enemies do not. They attack from above, reposition vertically to angles that ground cover does not protect against, and create a second layer of threat that competes for attention while ground enemies are also active. The flying category ranges from manageable harassment with Wasps to encounter-defining pressure with Rocketeers, and the threat difference between the bottom and top of that range is dramatic.
Wasps are the baseline flyer. They hover at moderate range and fire projectiles in patterns that become readable after a few encounters. A single Wasp is a nuisance. Two or three Wasps firing simultaneously start creating real pressure, especially in the open without overhead cover. The weak spot on Wasps is the rear thruster, and hitting it shortens the fight significantly compared to body shots. The common mistake with Wasps is ignoring them because they seem minor. Grouped Wasps deal cumulative damage that chips away at health during fights; the player is trying to manage against other enemies simultaneously.
Hornets are an aggressive step up. They close the distance more willingly, their burst damage hits harder, and they are more persistent in pursuing players who try to reposition. The thruster weak spot remains the primary target, but Hornets give less time to line up the shot because they reposition more frequently. Solid vertical cover, meaning roofs, overhangs, or interior spaces with ceilings, is the most reliable counter to Hornet pressure.
Fireflies are the most distinct flyers in the roster. They pursue aggressively, closing distance rather than holding range, and they carry a visible gas tank on their rear that functions as both their weak spot and their most dangerous feature. Hitting the gas tank produces a quick kill, often in a single well-placed shot. Missing it or ignoring it allows the Firefly to close range and release gas that creates an area hazard around the player. The gas tank is visible, exposed, and rewards accurate shooting directly. Fireflies are one of the few enemies where a single, precise shot produces a dramatically better outcome than spraying body shots.
Rocketeers sit at the top of the flying threat hierarchy. They hold range, fire explosive projectiles with splash damage, and create sustained pressure that pins players behind cover. A Rocketeer engaging a player in the open is one of the most dangerous situations in a standard raid because the splash damage means near-misses still hurt, and the fire rate means repositioning between shots is tight. Hard cover is mandatory against a Rocketeer. Peeking from cover to return fire needs discipline because staying exposed for even a second too long invites a direct hit.
| Enemy | Attack Pattern | Weak Spot | Best Cover Type | Best Weapon Trait | Common Mistake |
|---|---|---|---|---|---|
| Wasp | Hovering ranged shots at moderate pacing | Rear thrusters | Overhead or angled cover | Accurate semi-auto for efficient kills | Ignoring grouped Wasps as minor threats |
| Hornet | Aggressive ranged bursts with repositioning | Rear thrusters | Solid vertical cover with ceiling | Burst or automatic fire for moving targets | Staying exposed during burst cycles |
| Firefly | Aggressive pursuit with gas release on proximity | Gas tank (rear, one-shot potential) | Distance and lateral movement | Accurate single shots targeting the tank | Letting it close range instead of targeting the tank early |
| Rocketeer | Ranged explosive projectiles with a splash radius | Exposed panels during the attack wind-up | Hard cover, solid walls, building interiors | Sustained automatic fire during peek windows | Peeking without a cover plan or staying exposed too long |

Heavy Ground Machines
Leapers, Bastions, Bombardiers, Comets, and Shredders occupy the space between standard patrol enemies and boss encounters. They are not bosses, but they fundamentally change any encounter they appear in. Heavy enemies demand more ammunition, more time, better positioning, and stronger weak-point discipline than anything else in the standard roster. Fighting one while prepared is a resource investment. Fighting one while unprepared is how runs end.
Leapers are the most mobile heavy enemy. Their defining mechanic is a lunging attack that closes distance rapidly, punishing players who try to hold a static position. The correct response is continuous movement. Maintain spacing, backpedal or strafe during lunge attacks, and target the leg joints that become exposed during the recovery animation after each lunge. Players who try to face-tank a Leaper at close range discover quickly that its melee damage output exceeds what most loadouts can absorb. Distance is the counter.
Bastions represent the opposite end of the heavy spectrum. Slow, heavily armoured, and built to control space with sustained fire that denies areas and punishes frontal approaches. The frontal armour absorbs enormous damage without meaningful effect, which means fighting a Bastion head-on is an ammunition sink. The leg joints and rear panels are the actual damage windows, and accessing them requires flanking. In a squad, one player holds the Bastion’s attention while others circle for weak spots. Solo players facing a Bastion should strongly consider whether the fight is worth the resources, because it will cost a significant portion of ammunition and medical supplies to bring one down alone.
Bombardiers apply ranged area pressure through explosive barrages that cover wide ground and force repositioning. Between barrage cycles, the leg joints are vulnerable to damage. The counter-strategy splits into two approaches: close distance quickly to disrupt barrage timing before it starts, or use solid cover that blocks the splash damage entirely and peek during recovery between cycles. On open terrain without cover, a Bombardier is one of the most dangerous enemies in the game because the barrage has no good answer on flat ground.
Comets reward sustained aggression specifically. Their armoured exterior absorbs damage initially, but sustained automatic fire forces the Comet to open, exposing internal components that take significantly increased damage. The design rewards players who commit to the fight at medium range with an automatic weapon, maintaining pressure until the shell opens and capitalising on the damage window. The common mistake is either giving up because initial shots seem ineffective or trying to fight with a semi-auto weapon that cannot generate enough sustained pressure to force the opening.
Shredders are built to kill players who let them close the distance. Forward damage output at melee range is devastating, and the approach pressure forces a binary decision: kite backwards and create distance, or commit to a fight in their effective range and accept the damage trade. The correct answer is almost always to kite. Rear canisters and leg joints are the weak spots, both more accessible while maintaining distance and circling rather than absorbing damage face-to-face. Fighting a Shredder in a confined space is one of the fastest ways to lose health in the game.
| Enemy | Solo Difficulty | Main Reason | Weak Spot Access | Recommended Approach |
|---|---|---|---|---|
| Leaper | Medium | Fast gap closers punish static positioning | Leg joints visible during lunge recovery | Continuous backpedal, target legs between attacks |
| Comet | Medium | Requires sustained pressure to force the shell open | Internal components exposed when pressured | Sustained automatic fire at medium range |
| Shredder | Medium-High | Devastating close-range output punishes mistakes | Rear canisters require flanking or kiting | Kite backwards at range, avoid confined spaces |
| Bombardier | High | Explosive barrage covers a wide area, hard to dodge solo | Leg joints accessible between barrage cycles | Rush to close the distance or use a hard cover between cycles |
| Bastion | High | Heavy frontal armour and sustained fire deny a direct approach | Leg joints and rear panels require flanking | Flank with a squad or avoid entirely when solo |

Boss-Level ARC Encounters
The Queen and Matriarch are not bigger versions of standard enemies. They are encounter-defining threats that change raid priorities, route safety, noise levels, and third-party risk for everyone in the surrounding area. Engaging a boss is not a normal combat encounter. It is a strategic decision with implications that extend well beyond the fight itself.
Both bosses are large, multi-phase machines that punish poor cover use, demand sustained coordinated damage output, and spawn additional enemies during the fight. The combat flow follows a progression: strip armour from the legs and face to expose the core, then focus damage on the exposed core during the window before armour regenerates or the boss repositions. This multi-stage weak-point system means boss fights are longer, louder, and more resource-intensive than any standard encounter in the game.
The Queen patrols near Harvester events and represents one of the highest-reward encounters available. The Harvester interior contains legendary loot, including blueprints for high-tier weapons. Accessing that loot means dealing with the Queen either by fighting through or by timing entry to avoid her patrol route. The Queen’s design creates multiple weak-point angles that demand repositioning throughout the fight, and adds spawns that force the squad to split attention between the boss and secondary threats.
Both bosses demand:
- Armour stripping on legs and face before the core becomes targetable. Damage to armoured sections without accessing weak points is largely wasted ammunition.
- Add-spawn management as a team responsibility. Ignoring spawned enemies to focus solely on the boss creates flanking threats that down players at critical moments.
- Hard cover usage throughout the fight. Boss attacks deal heavy damage and require cover cycling rather than face-tanking.
- Coordinated focus fire during core exposure windows. The core is the high-damage opportunity. Maximising output during those windows shortens the fight significantly.
- Resource commitment assessment before engaging. A boss fight that fails halfway through wastes ammunition, medical supplies, and time without producing any reward. Going in underprepared is worse than skipping the fight entirely.
Solo players should avoid boss encounters unless significantly overgeared and experienced with the fight mechanics. The intended difficulty assumes squad-level coordination, and the resource investment for a solo attempt is enormous even when successful.

ARC Raiders Enemy Weak Spots: How Players Should Read Them
Weak-point targeting is the single most impactful combat habit in ARC Raiders. Hitting a weak spot ends the fight faster, consumes less ammunition, creates less noise, and reduces the time spent exposed to other threats. In a game where every fight carries opportunity cost, efficient kills through weak-point discipline are always preferable to brute-force damage against armoured surfaces.
The game uses recurring weak-spot patterns across enemy categories. Learning the logic once transfers across the entire roster:
- Flying enemies share thruster-based weak spots. Wasps, Hornets, and Rocketeers all have exposed thrusters on their rear or underside. Firefly replaces the thruster pattern with a visible gas tank. In all cases, the weak spot is a mechanically distinct component on the back half of the enemy. Fighting a flyer means looking behind it.
- Heavy ground enemies share leg-joint and rear-component weak spots. Leapers, Bastions, Bombardiers, and Shredders all have leg joints as a primary or secondary weak point. Several also have rear canisters or panels that take increased damage. Comets follow a different pattern where sustained pressure forces the shell open to reveal the internals. The common threat for ground heavies is that frontal armour absorbs damage, and the real targets are on the sides, rear, or joints.
- Boss enemies use multi-stage weak-point progression. Legs and face serve as first-stage targets for armour stripping. Once stripped, the core becomes exposed as the high-damage window. This progression means committing to the full sequence is necessary for meaningful damage, and players who do not understand the progression waste ammunition on surfaces that are not yet vulnerable.
- Recon and small enemies are fragile all over. Ticks, Pops, Fireballs, Snitches, and Surveyors do not require specific weak-point targeting. Fast, accurate fire to the body drops them. The priority is speed of kill rather than precision of placement.
| Enemy | Weak Spot | When It Is Exposed | Best Angle | Why It Matters |
|---|---|---|---|---|
| Wasp / Hornet | Rear thrusters | Always visible from behind or below | Rear or underside approach | 2-3x faster kill compared to body shots |
| Firefly | Gas tank (rear) | Always visible, glowing component | Rear approach before it closes the distance | One-shot kill potential, prevents gas release entirely |
| Rocketeer | Exposed panels/thrusters | During attack wind-up, panels shift open | Rear or side during attack animation | Stops explosive pressure significantly faster |
| Leaper | Leg joints | Exposed during lunge recovery frames | Side angle during landing | Slows mobility, reduces gap-close effectiveness |
| Bastion | Leg joints / rear panels | After armour stripping or from behind | Rear flank or side approach | Bypasses heavy frontal armour entirely |
| Bombardier | Leg joints | Between barrage cycles during repositioning | Side or front during barrage downtime | Disrupts barrage output and reduces area threat |
| Comet | Exposed internal components | Shell forced open by sustained automatic fire | Front (when open after sustained pressure) | High damage window, rewards automatic fire commitment |
| Shredder | Rear canisters / leg joints | Accessible from behind during kiting | Rear or side while maintaining distance | Avoids devastating frontal damage output entirely |
| Queen / Matriarch | Legs, face (strip armour), then core | Core exposed after sufficient armour damage | Front or below during core exposure window | Only viable damage path for boss-level kills |
How Enemy Types Change Your Tactics In A Real Raid
Understanding enemy types goes beyond individual combat encounters. The enemies present in an area affect how players move through it, how long they stay, how much noise they generate, when they heal, and how their extraction timing adjusts. A fight that takes thirty seconds against one enemy type might take two minutes against another, and those extra ninety seconds create noise that attracts additional threats, consume medical supplies needed for the exit, and delay the rotation toward extraction by time that may not be available.
Audio plays a central role in pre-engagement decision-making. ARC machines produce distinct movement and activation sounds that carry through the environment before visual confirmation. The skittering of Ticks in an adjacent room. The hum of a Surveyor scanning overhead. The heavy footfall of a Bastion on patrol. The rocket propulsion sound of a Rocketeer preparing to fire. Each of these audio cues delivers information that visual scanning alone cannot provide, and players who learn to process audio cues before committing to movement consistently make better tactical decisions.
Terrain changes the threat level of the same enemy dramatically. A Bombardier in an open field with no cover is terrifying because the barrage has no answer on flat terrain. The same Bombardier near a building with hard walls is manageable because the building absorbs splash damage and provides a place to peek from. A Rocketeer over dense forest with overhead canopy is less threatening than one over an open hillside because trees break sightlines naturally. Reading terrain as part of enemy assessment is what turns encounters from reactive to proactive.
| Scenario | Most Dangerous Enemy Type | Why | Best Response | Biggest Mistake |
|---|---|---|---|---|
| Indoor looting in tight rooms | Ticks / Pops | Confined space amplifies swarm damage and explosive proximity | Clear every room before interacting with containers | Looting before checking corners and adjacent rooms |
| Open field crossing between POIs | Rocketeer / Bombardier | No cover against explosive projectiles with splash | Sprint between terrain features, never cross open ground slowly | Walking in a straight line without scanning the sky |
| Approaching ARC extraction point | Snitch | Reinforcement call near extraction creates an unaffordable fight | Kill the Snitch before engaging anything else in the area | Ignoring it to fight the louder enemy while the call completes |
| Entering a new area of the map | Surveyor | Detection triggers pursuit escalation across the entire area | Scan for Surveyors before committing to the new zone | Rushing in and getting scanned, then fighting escalated patrols |
| Low on ammo and health mid-raid | Any heavy ground machine | Cannot afford the resource cost of an extended fight | Disengage, reroute, and avoid the encounter entirely | Forcing the fight with insufficient resources to finish it |
| Squad member down during rotation | Leaper | Gap-closing attacks punish stationary revive attempts | Clear the Leaper before attempting the revive | Trying to revive while the Leaper is still active and lunging |

Best Loadout Thinking For Different Enemy Types
Enemy understanding should connect directly to loadout choice. Different threats respond to different weapon traits, and building a kit around what the player expects to encounter improves combat efficiency across the entire raid. The goal is not to prescribe a single meta build. The goal is to think about weapon roles and utility choices in terms of the threats they counter.
| Enemy Type | Weapon Trait To Prioritize | Useful Utility | Why It Works | Solo / Squad Note |
|---|---|---|---|---|
| Flying enemies | Accurate semi-auto or burst fire with good vertical tracking | Grenades for clustered flyers, positioning tools | Precision in moving aerial targets conserves ammo and shortens exposure | Solo: engage one at a time from cover. Squad: focus fire to clear quickly |
| Heavy ground | Sustained automatic fire with a deep magazine | Explosives for armour stripping, healing for extended fights | Sustained pressure is how weak points on heavies become accessible | Solo: kite at range and manage distance. Squad: flank and split attention |
| Ambush / close-range | High fire rate, fast target acquisition, hip-fire accuracy | Quick heals for post-ambush recovery, audio gear | Reaction speed beats damage-per-shot against fast small targets | Solo: clear rooms before committing. Squad: lead player calls contacts |
| Recon/support | Fast-killing option that can interrupt call animations | Ranged accuracy for quick Snitch eliminations | Kill speed prevents reinforcement cascades that drain resources | Reaction speed beats damage-per-shot against fast, small targets |
| Boss encounters | High sustained DPS with large magazine capacity | Team healing, revive readiness, explosives for add management | Long fights require sustained damage output and resource management | Solo: avoid unless overgeared. Squad: assign DPS, healer, and add-clear roles |

The most versatile solo loadout pairs a mid-range automatic weapon for heavy enemies and general combat with a faster close-range option for ambush threats and indoor encounters. This covers the majority of situations without over-specialising for any single enemy type. Squads can afford more specialisation because roles are distributed across players. Having one member carry an accurate semi-auto for flyers while another runs a high-DPS automatic for heavies means the squad handles both situations cleanly without compromising either response.
Avoid building an entire loadout around boss fights unless specifically planning to engage one. Boss encounters are optional strategic decisions, not default engagements. Building a boss-killing kit for a raid where no boss fight occurs leaves the player over-specialised for the encounters that actually matter on most runs.
Beginner Tips For Learning ARC Raiders Enemy Types Faster
Building enemy recognition takes time, but these habits accelerate the process by focusing attention on the information that matters most during actual raids.
- Identify movement type before anything else. Flying, crawling, walking, charging, or rolling. Movement type reveals the category, and the category dictates the response. Knowing the enemy’s name is not necessary to react correctly if the movement is read accurately.
- Seek cover before engaging any new threat. The instinct to start shooting the moment an enemy appears is strong, but moving to cover first provides time to identify the threat, choose the right weapon, and position for the weak spot. A fight started from good cover always goes better than one started from a surprised standing position.
- Listen before looking. ARC enemies produce audio cues that travel through walls, around corners, and across distances where visual identification is not yet possible. The skittering of small enemies, the hum of flyers, the heavy steps of ground machines. Processing those sounds as threat information before rounding a corner provides a critical advantage.
- Kill the Snitch first. Always. If one target priority rule is learned and applied consistently, this is the one. A Snitch that completes its call makes every subsequent fight in the area harder. A dead Snitch prevents that entirely.
- Do not force fights against heavy enemies when resources are low. If ammo is below half and healing is running thin, a heavy ground machine is not a fight worth taking. Reroute around it and save remaining resources for the extraction trip.
- Learn one enemy category well per session rather than trying to memorise the full roster. Pick a category, pay specific attention to it during the next few raids, and practice targeting its weak spots deliberately. Focused practical experience builds recognition faster than reading about all sixteen enemies at once.
- Watch for weak-spot patterns across categories. Thrusters on flyers. Leg joints on heavies. Cores on bosses after armour strip. Once the patterns are visible, the system becomes predictable and new enemies fit into categories already understood.
- After each death, identify which enemy killed you and what the alternative response would have been. Failed encounters are the best learning opportunities when processed deliberately. The enemy type that kills most often is the one to study next.
ARC Raiders Enemy Types: Final Summary
The best players in ARC Raiders do not just shoot faster. They identify threats faster. Recognising what is approaching in the first second of contact changes positioning, weapon choice, cover usage, and the fundamental decision about whether to fight at all. That recognition is the foundation every other combat skill in the game builds on.
Enemy types should be read by role, weak-spot logic, and tactical pressure rather than by name alone. A Snitch is more dangerous than a Leaper in the wrong moment because of what it enables, not because of its raw damage. A Rocketeer demands more respect than a Wasp because of what happens when a player stays exposed. Context determines threat level, and players who evaluate threats contextually make better decisions under pressure than players who treat every enemy the same.
Target priority, weak-point discipline, and engagement choice are the three pillars of effective ARC combat. Knowing which enemy to kill first in a mixed group, knowing where to aim on each target, and knowing when a fight is not worth taking at all. Build those habits through deliberate practice, and they carry through every raid, every map condition, and every situation the game presents.
ARC Raiders Enemy Types: FAQs
What are the main enemy types in ARC Raiders?
ARC Raiders features five categories of machine enemies: close-range ambush threats (Ticks, Pops, Fireballs), recon and support units (Snitches, Surveyors), flying pressure enemies (Wasps, Hornets, Fireflies, Rocketeers), heavy ground machines (Leapers, Bastions, Bombardiers, Comets, Shredders), and boss-level encounters (Queen, Matriarch). Each category demands different weapons, positioning, and tactical responses.
What are the ARC Raiders enemy weak spots?
Weak spots follow recurring patterns across enemy categories. Flying enemies have vulnerable rear thrusters or gas tanks. Heavy ground enemies expose leg joints, rear canisters, or internal components under sustained pressure. Boss enemies use a multi-stage progression where armour must be stripped from legs and face before the core becomes targetable. Smaller enemies like Ticks, Pops, and Snitches are fragile all over and do not require specific weak-point targeting.
Which ARC Raiders enemy types are hardest for beginners?
Rocketeers and Bombardiers cause the most trouble for newer players because of their explosive ranged damage and the cover discipline required to survive them. Both enemies punish players caught in the open or unfamiliar with hard cover usage against splash damage. Boss encounters are extremely difficult for beginners and should be avoided until strong loadouts and experienced squad members are available.
Should you fight every enemy in ARC Raiders?
No. Every fight costs ammunition, creates noise, attracts more threats, and takes time delaying extraction in ARC. If an enemy is not blocking the path, guarding needed loot, or directly threatening the player’s position, avoiding it is often the better call. Fights should serve a purpose that advances raid goals. Fighting by default is one of the fastest ways to run out of resources mid-raid.
Are flying enemies or ground enemies more dangerous?
It depends entirely on the specific enemy and the terrain. Flying enemies like Rocketeers are extremely dangerous in open areas with limited overhead cover because explosive projectiles deliver splash damage from near misses. Heavy ground enemies like Bastions are more threatening in confined spaces where flanking is difficult and sustained fire pins players in place. The most dangerous situation is a combination of both, managing vertical airborne threats and horizontal ground pressure simultaneously without adequate cover for either.
Do boss enemies have different weak spots in ARC Raiders?
Yes. Boss enemies like the Queen and Matriarch use multi-stage weak-point systems. The first stage requires stripping armour from legs and face through sustained focused fire. Once sufficient armour is removed, the core becomes exposed and damageable during a limited window. This multi-stage system makes boss fights longer, louder, and more resource-intensive than any standard encounter, requiring sustained coordinated fire across multiple damage phases to complete.